Bohemian Romance Jewelry

steampunk fashion

DIY Steampunk Monocle Bowler

D-I-Y-Samantha ExtanceComment

A fun DIY for Halloween! Great for a steampunk Sherlock Holmes or Watson! shot_1373926098697This DIY is relatively simple though it can be expensive (if you can't find a bowler for cheap). Here's what you'll need:

Bowler hat (preferably thrifted); Thick Chain (I used 4 inches); Safety Pin; Needle & Thread; Ribbon (mine was ribbon made to look like measuring tape); Small leather pouch; Magnifying glass; Game Spinner; Clock Gear; Jumps Rings; Pliers; Scissors, an Awl; Pins; and a medium Bike Gear (from a cassette)

Steps:

  1. Measure the amount of ribbon you'll need to fit snugly around the base of your bowler hat. Be sure to leave at least a 1/2 inch on each side to fold over your bike gear. Once you've measured the amount of ribbon you'll need, cut it. Set aside.
  2. Pick up your leather pouch, using your scissors (or an exacto knife), cut 2 slits on the back of your pouch (about 1/4 inch from one another in the same direction--either horizontally or vertically), then thread your ribbon through the slits. Next, using your awl, poke a hole in the front of your leather pouch (so that you can affix your chain to the pouch with a jump ring). Using your flat nosed pliers, attach the chain and the magnifying glass with a jump ring. Optional, also add a game spinner and a clock gear  with jump rings for further decoration.Hat 2
  3. Next, thread your ribbon (with the right side facing up) through your bike gear's holes on one side. Pin in place. Hold your bike gear in place (where you want it situated on your bowler hat and then wrap the ribbon around the base of your hat. Thread the end of the ribbon through the bike gear and pin in place. When you are pinning your ribbon, be sure that you are only pinning the ribbon together and not the ribbon to the hat. Hat 1
  4. Next, slide the ribbon off of the base of your bowler hat and sew the ribbon in place. Keep your stitches small and close together. Be sure to tie a sturdy knot and hide that knot on the side of the ribbon that will go against your hat (and therefore not be seen). Cut off any excess ribbon in the back. Repeat for the other side.
  5. Slide your ribbon down onto your bowler hat in place around the base. Place the magnifying glass inside the leather pouch and see how far the chain dangles off of the hat's brim. If desired, using your safety pin, pin the chain to the opposite side of your bowler hat's brim until you want to use the "monocle"/magnifying glass. Hat 3
  6. Wear proudly! Hat 4As always, happy crafting!
The Beauty of Collaboration

Fashion, InspirationSamantha ExtanceComment

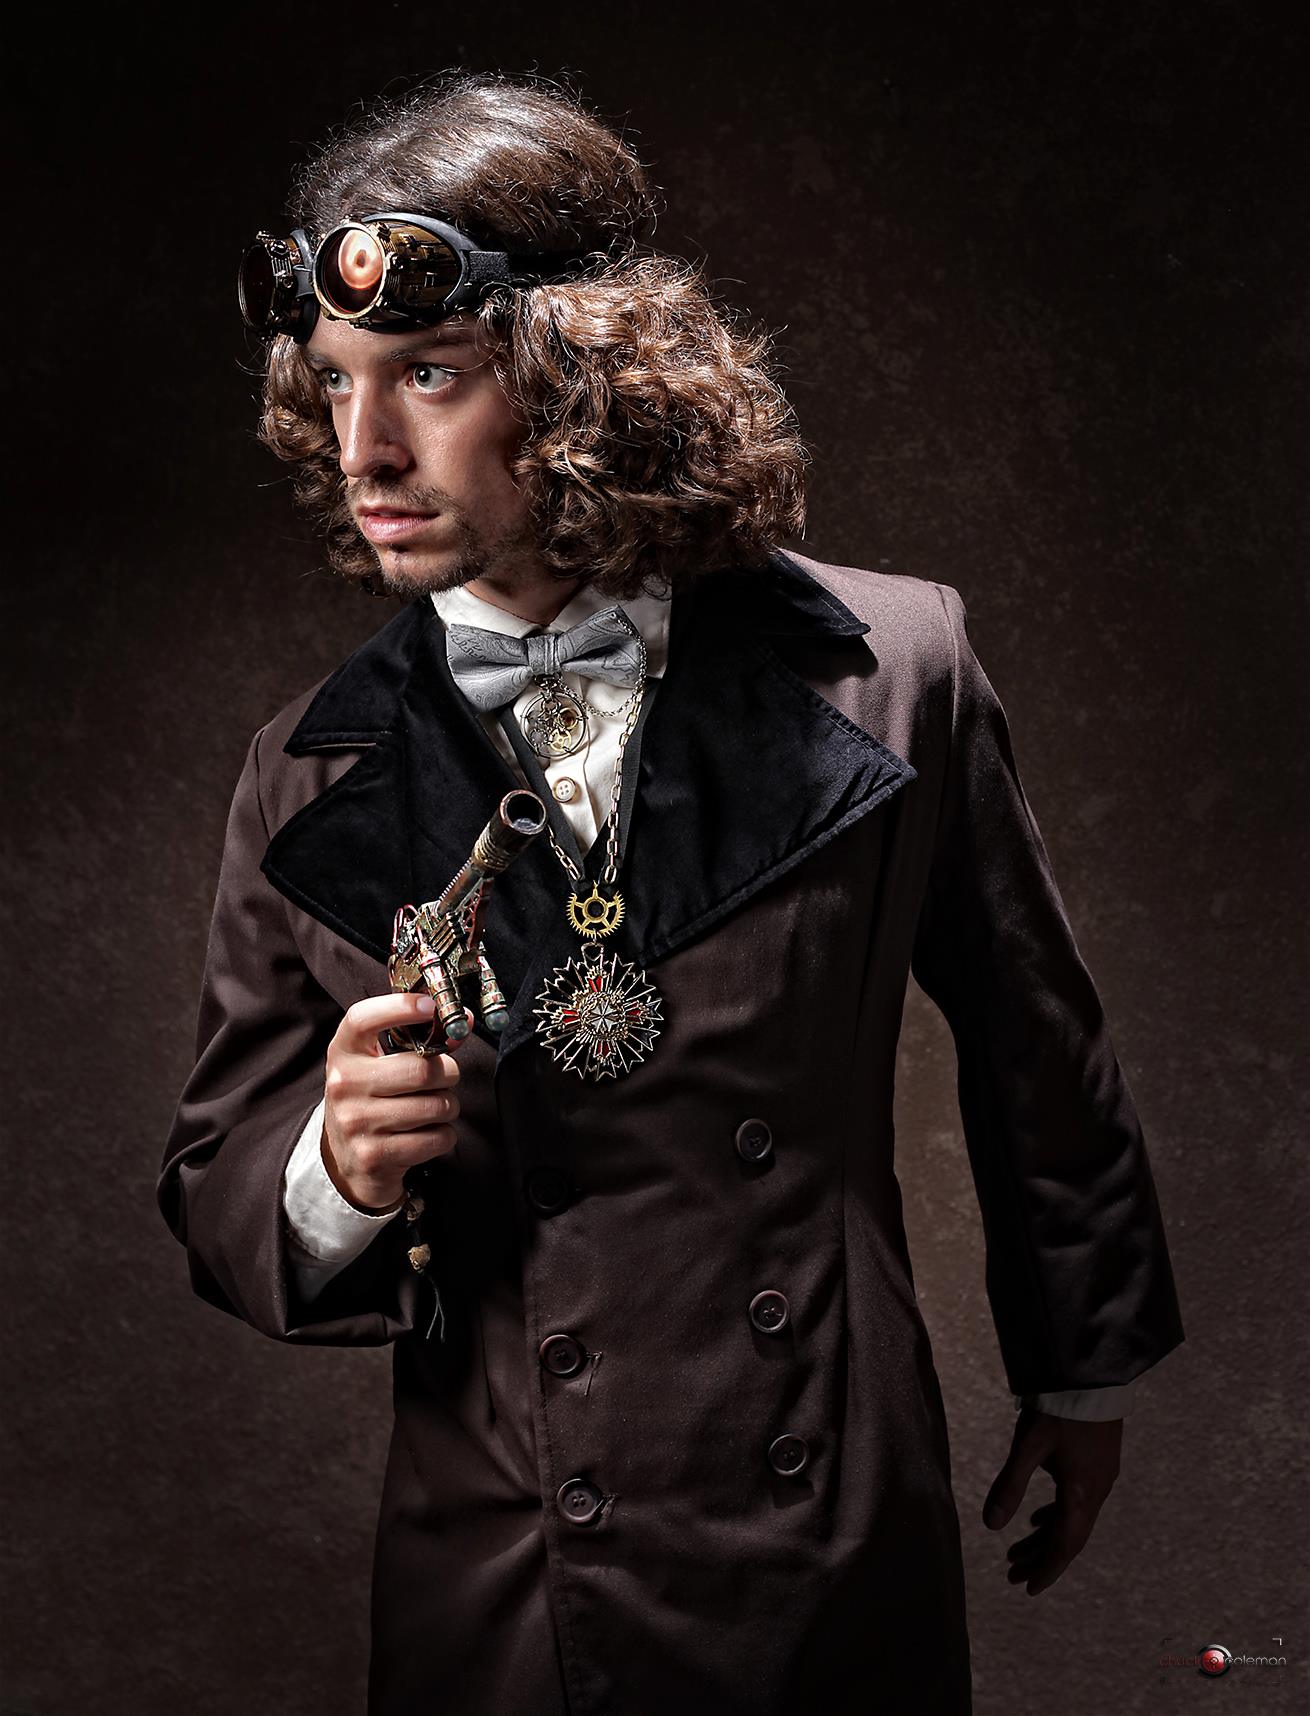
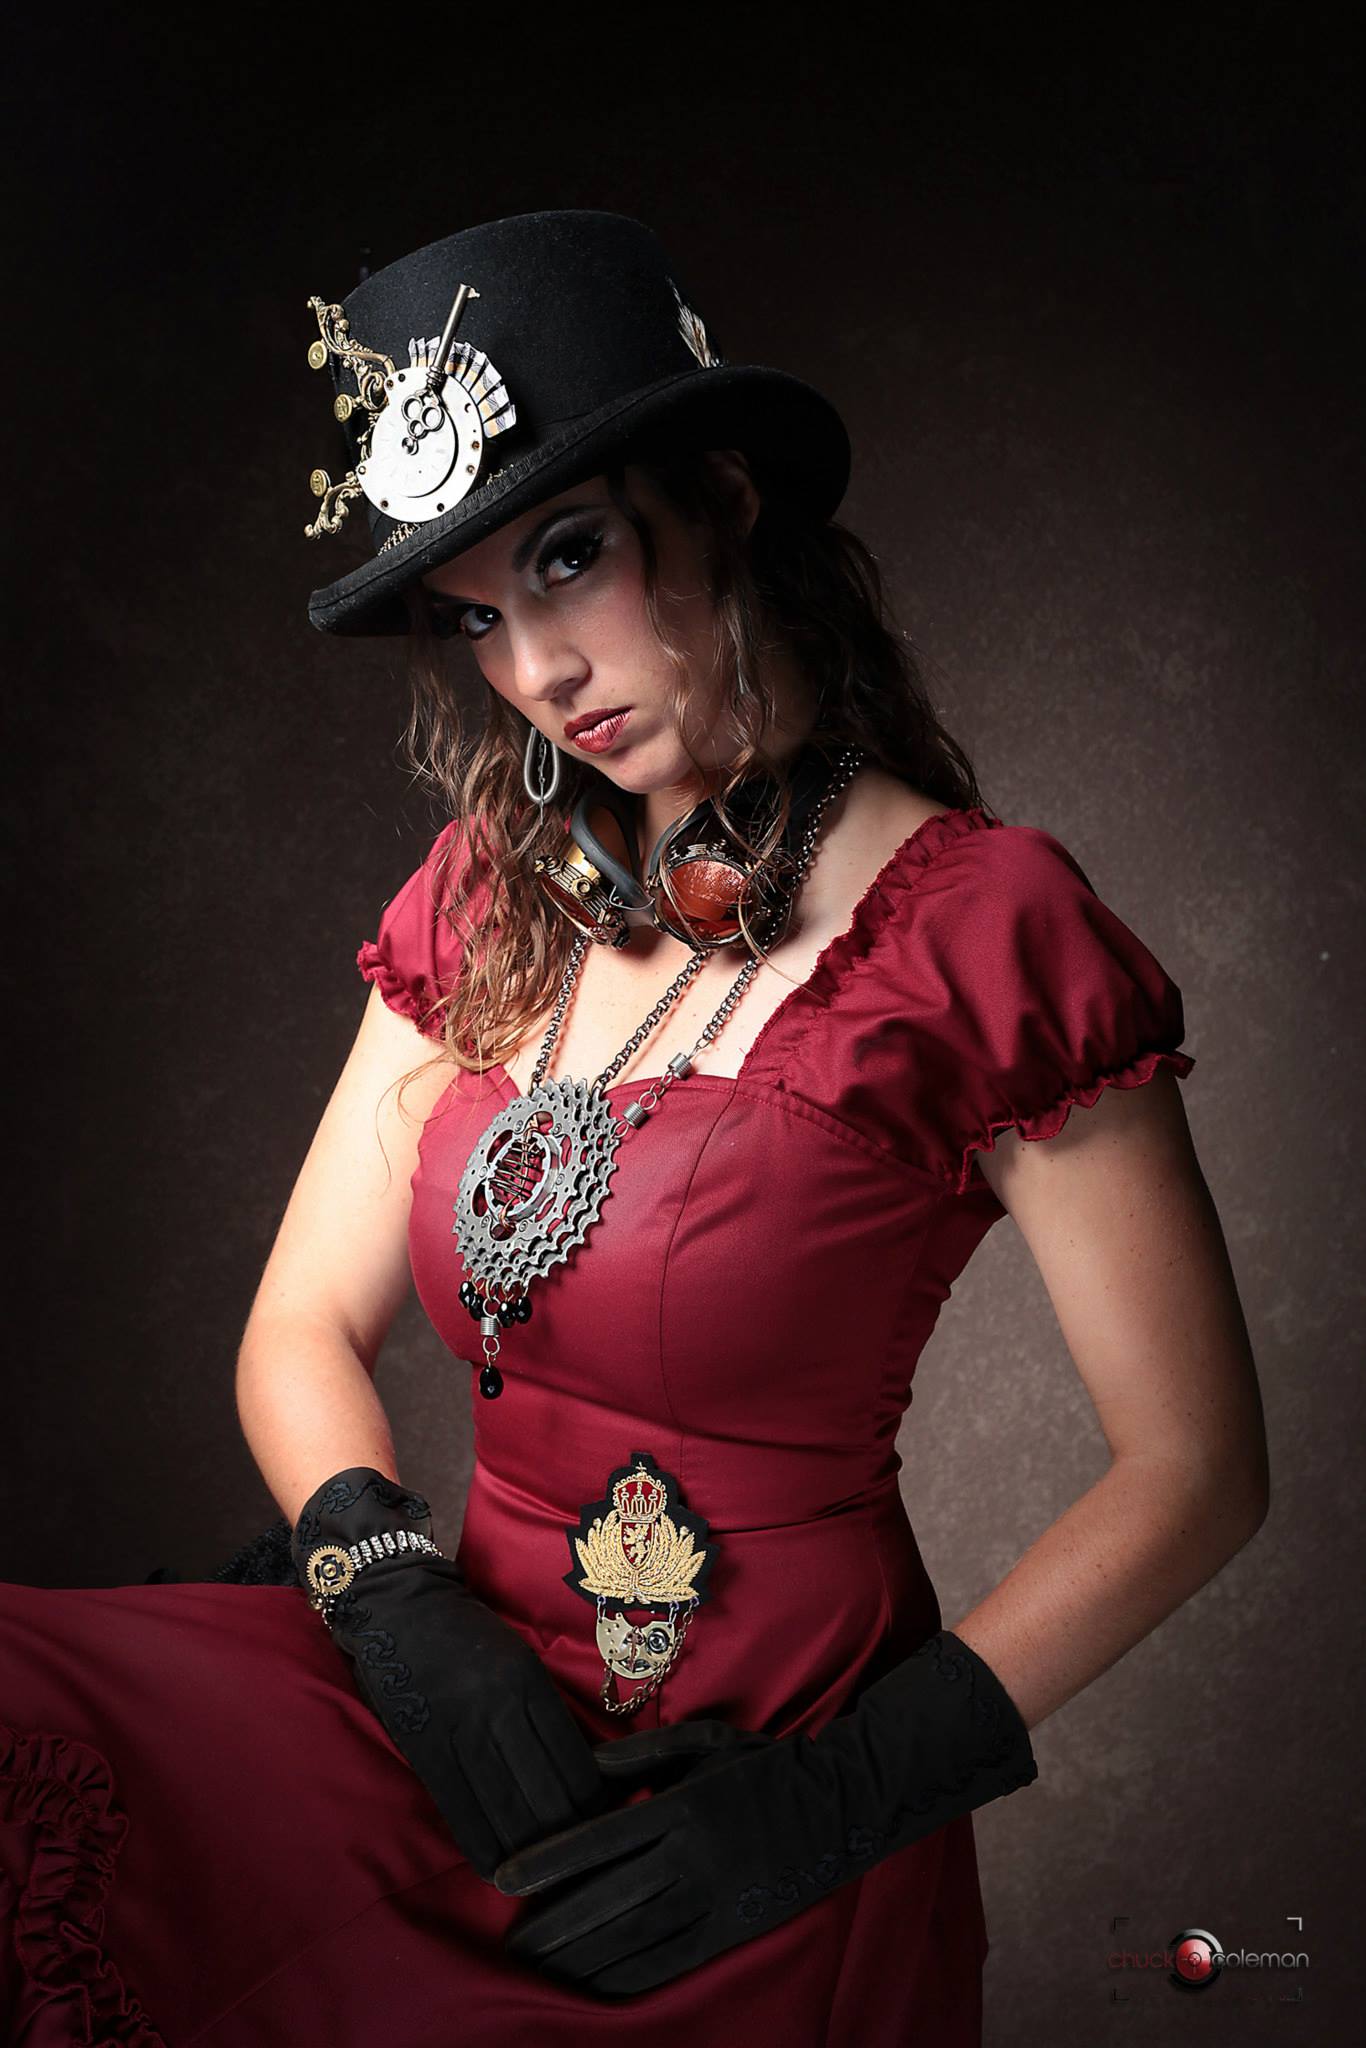
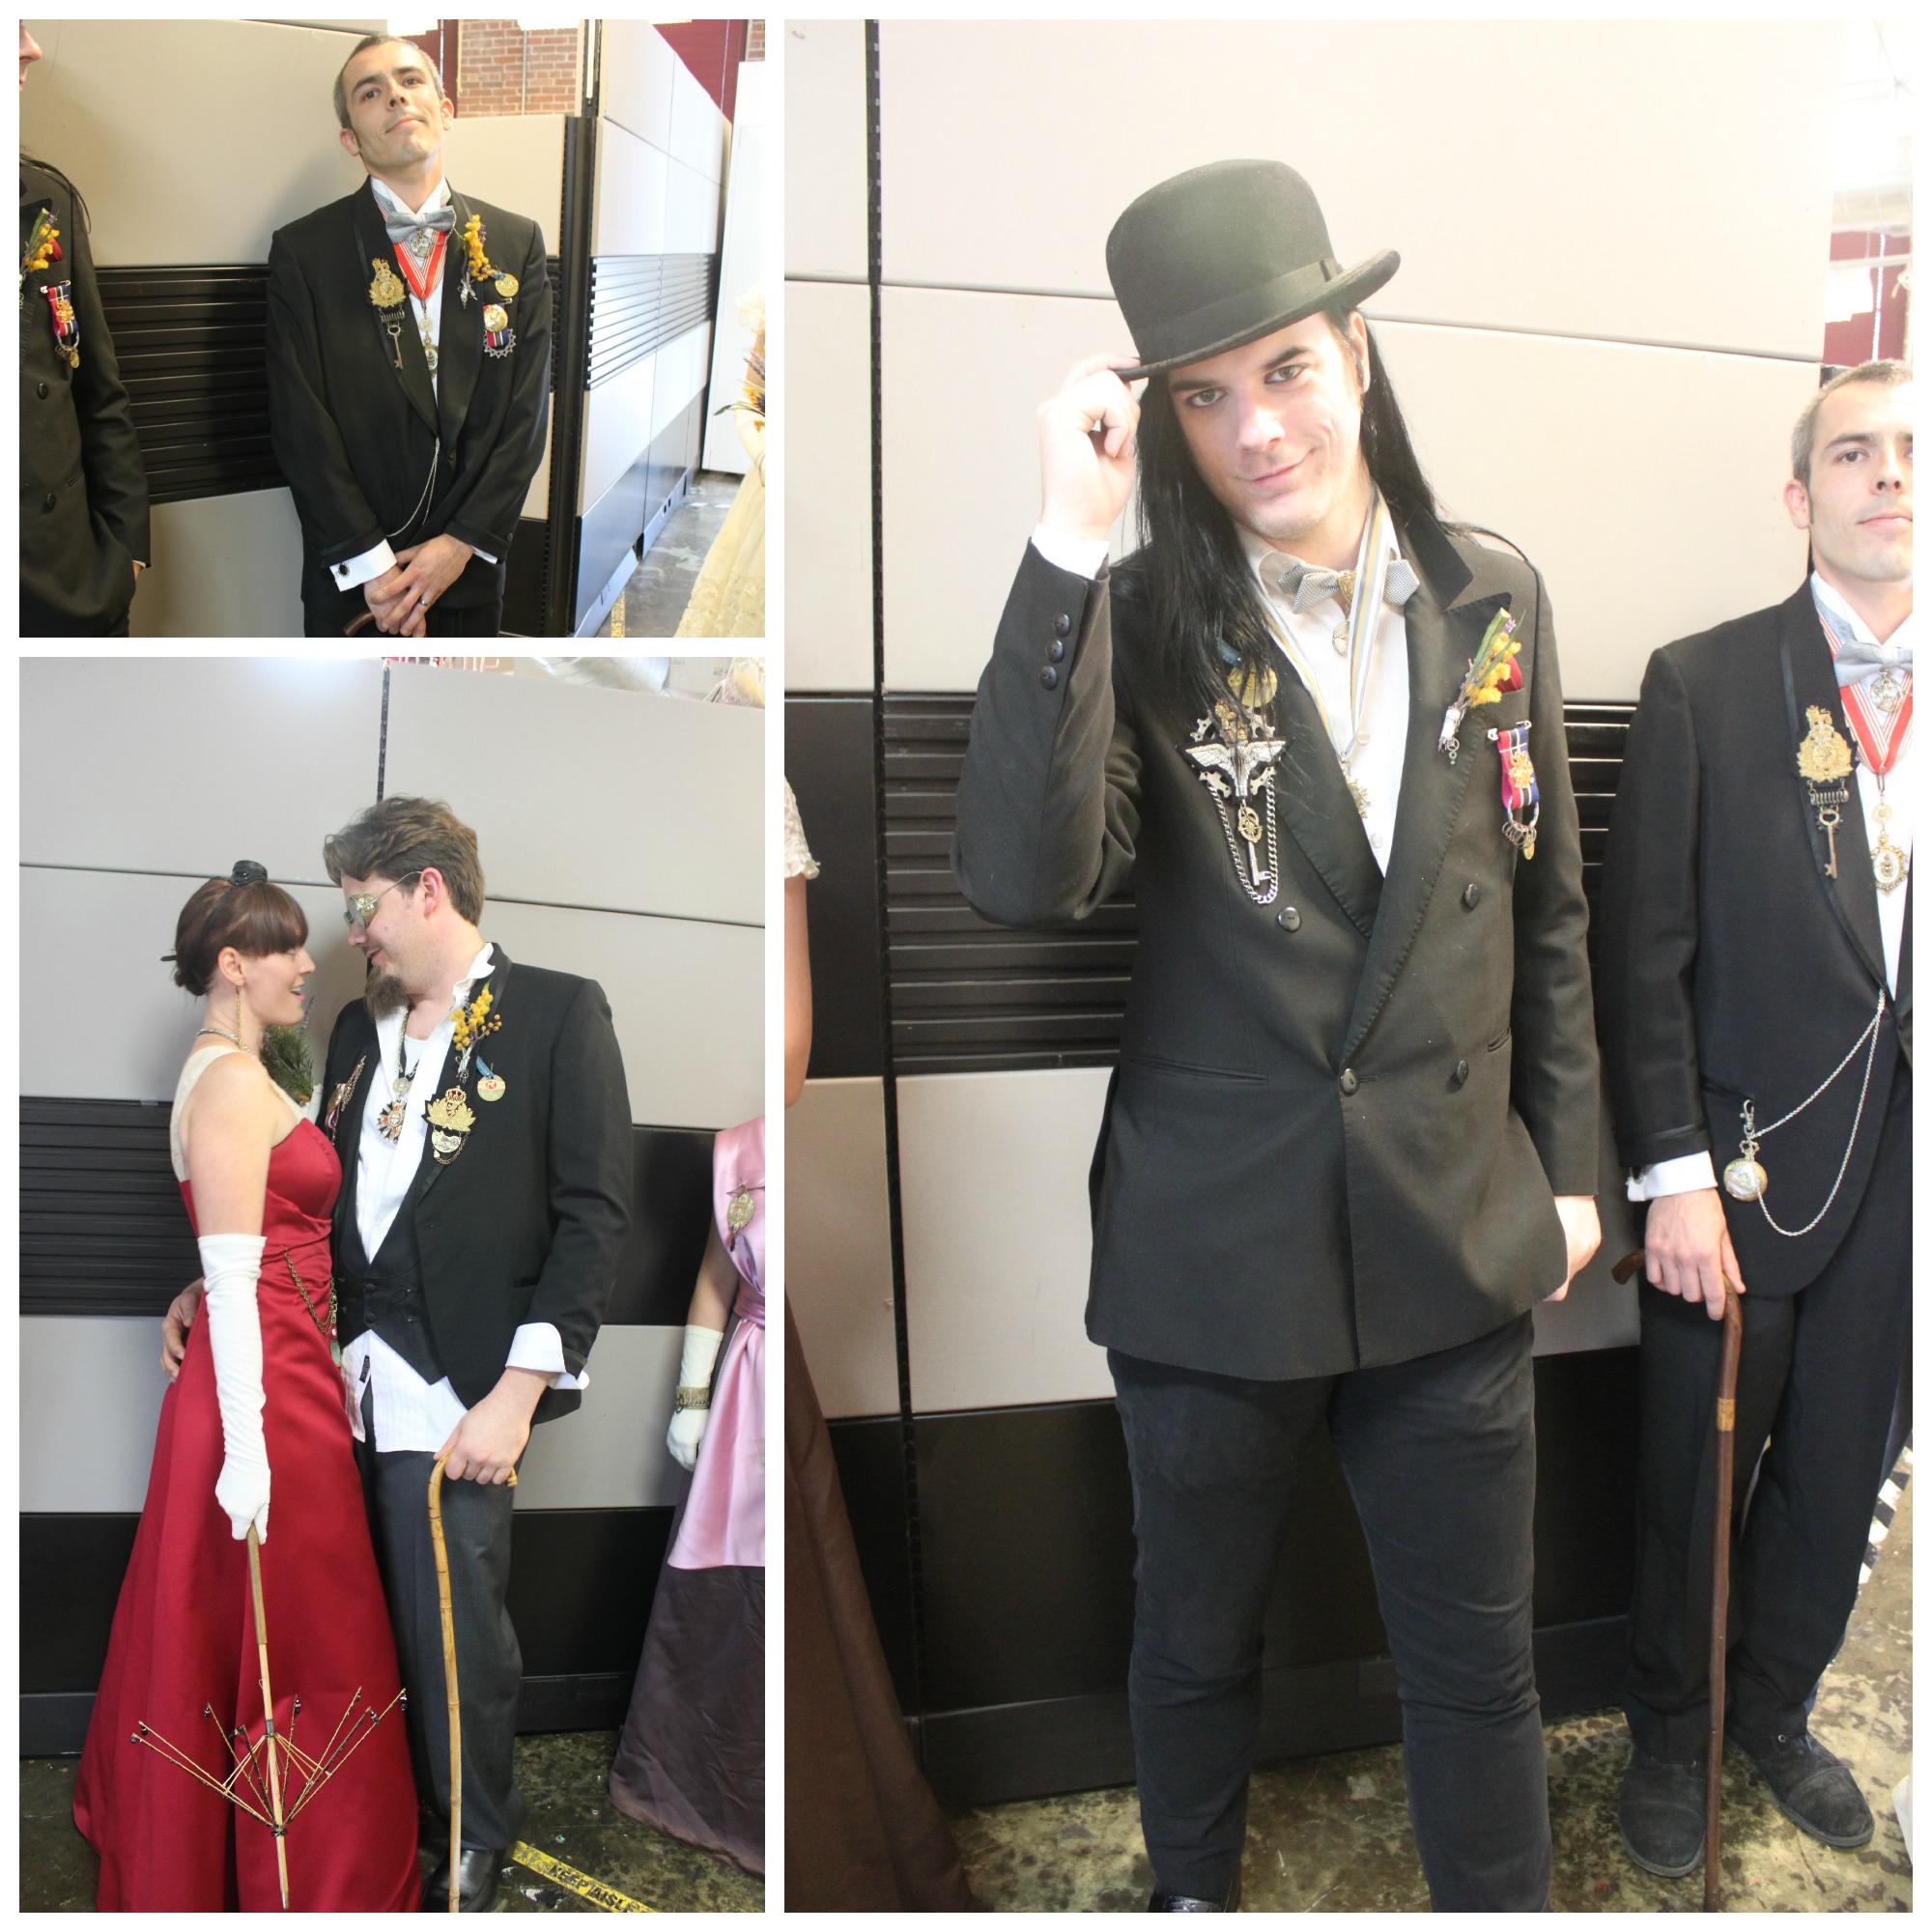
This weekend my jewelry & accessories were used in a steampunk fashion shoot & workshop for photographers. Here is a selection of stunning photographs taken by the very talented Chuck Coleman, of CCI Agency and Steamers World,  to whom I owe a tremendous Thank You. Chuck captured photos that seem as if they were plucked from one of the many fictional worlds that inspire me! I can't wait to see how Chuck's artistry grows and hope that this will be the start of many more collaborations! 1074743_398542726923005_1080550050_oPictured above is the Frankly Scarlet Top Hat, Skeleton Umbrella, Golden Gear Cameo Necklace, and Spring Earrings! 1077266_399039543539990_378457749_oPictured above is the Pocketwatch Bow Tie (a favorite of mine!) and a Royal Steampunk Medallion. Is this chap dashing?

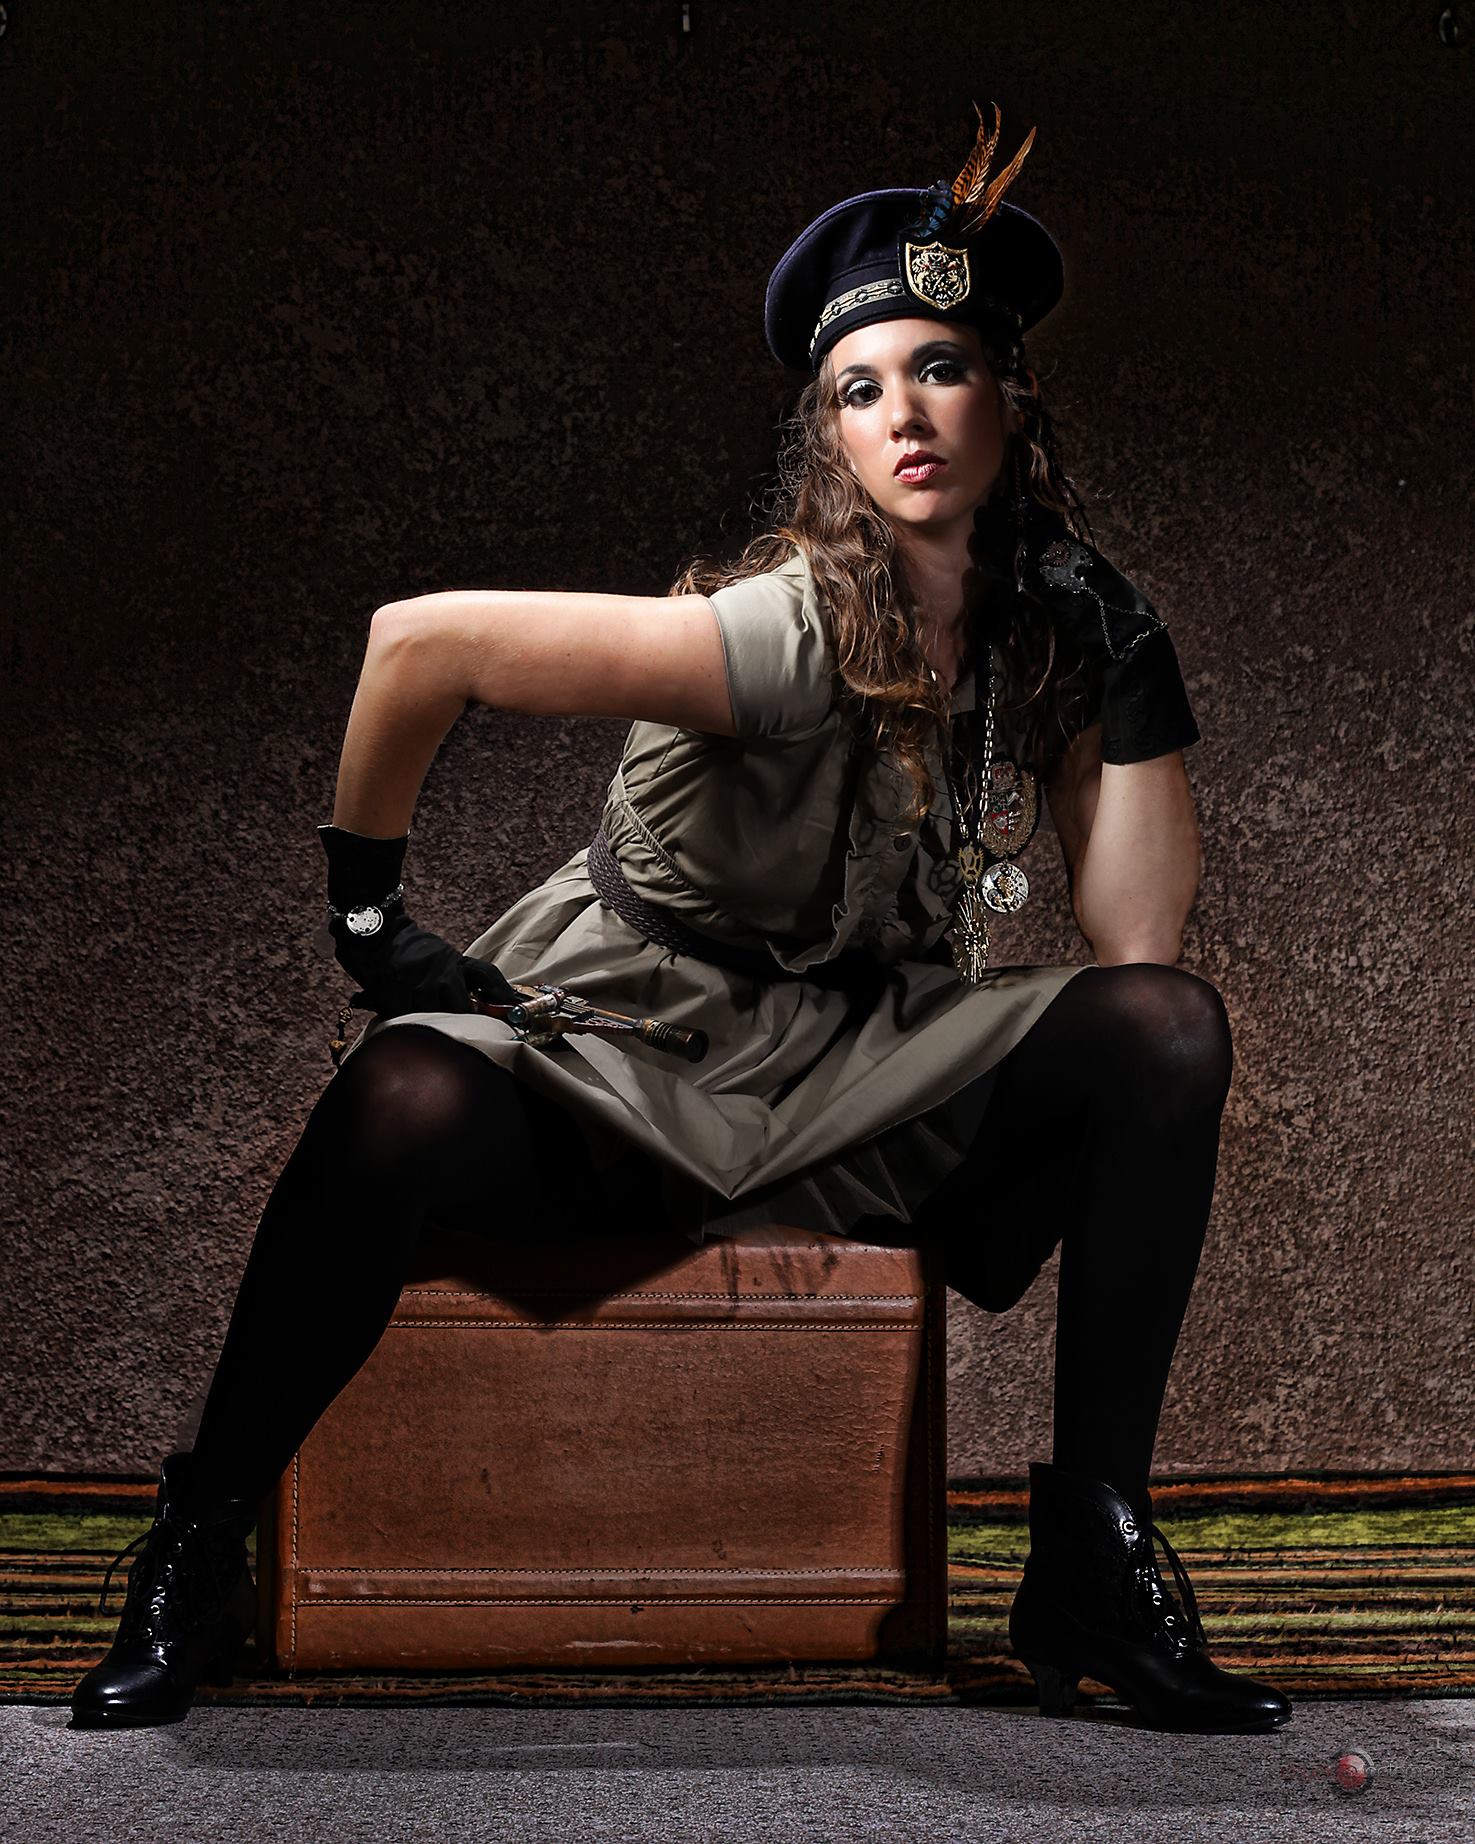
1072645_398556406921637_2133111456_oPictured above is the Time Conductor's Top Hat, Steampunk Princess Braclet, Royal Crest Medal, Spring Earrings, and a Steampunk Bicycle Gear Necklace. Strong, beautiful, and not to be trifled with!

1074023_398627126914565_1776030313_oPictured above is the Steampunk Highlander Hat, Compass Slave-Bracelet, Royal Steampunk Crest Medal, Simply Steampunk Gear Bracelet, and a Royal Steampunk Medallion.

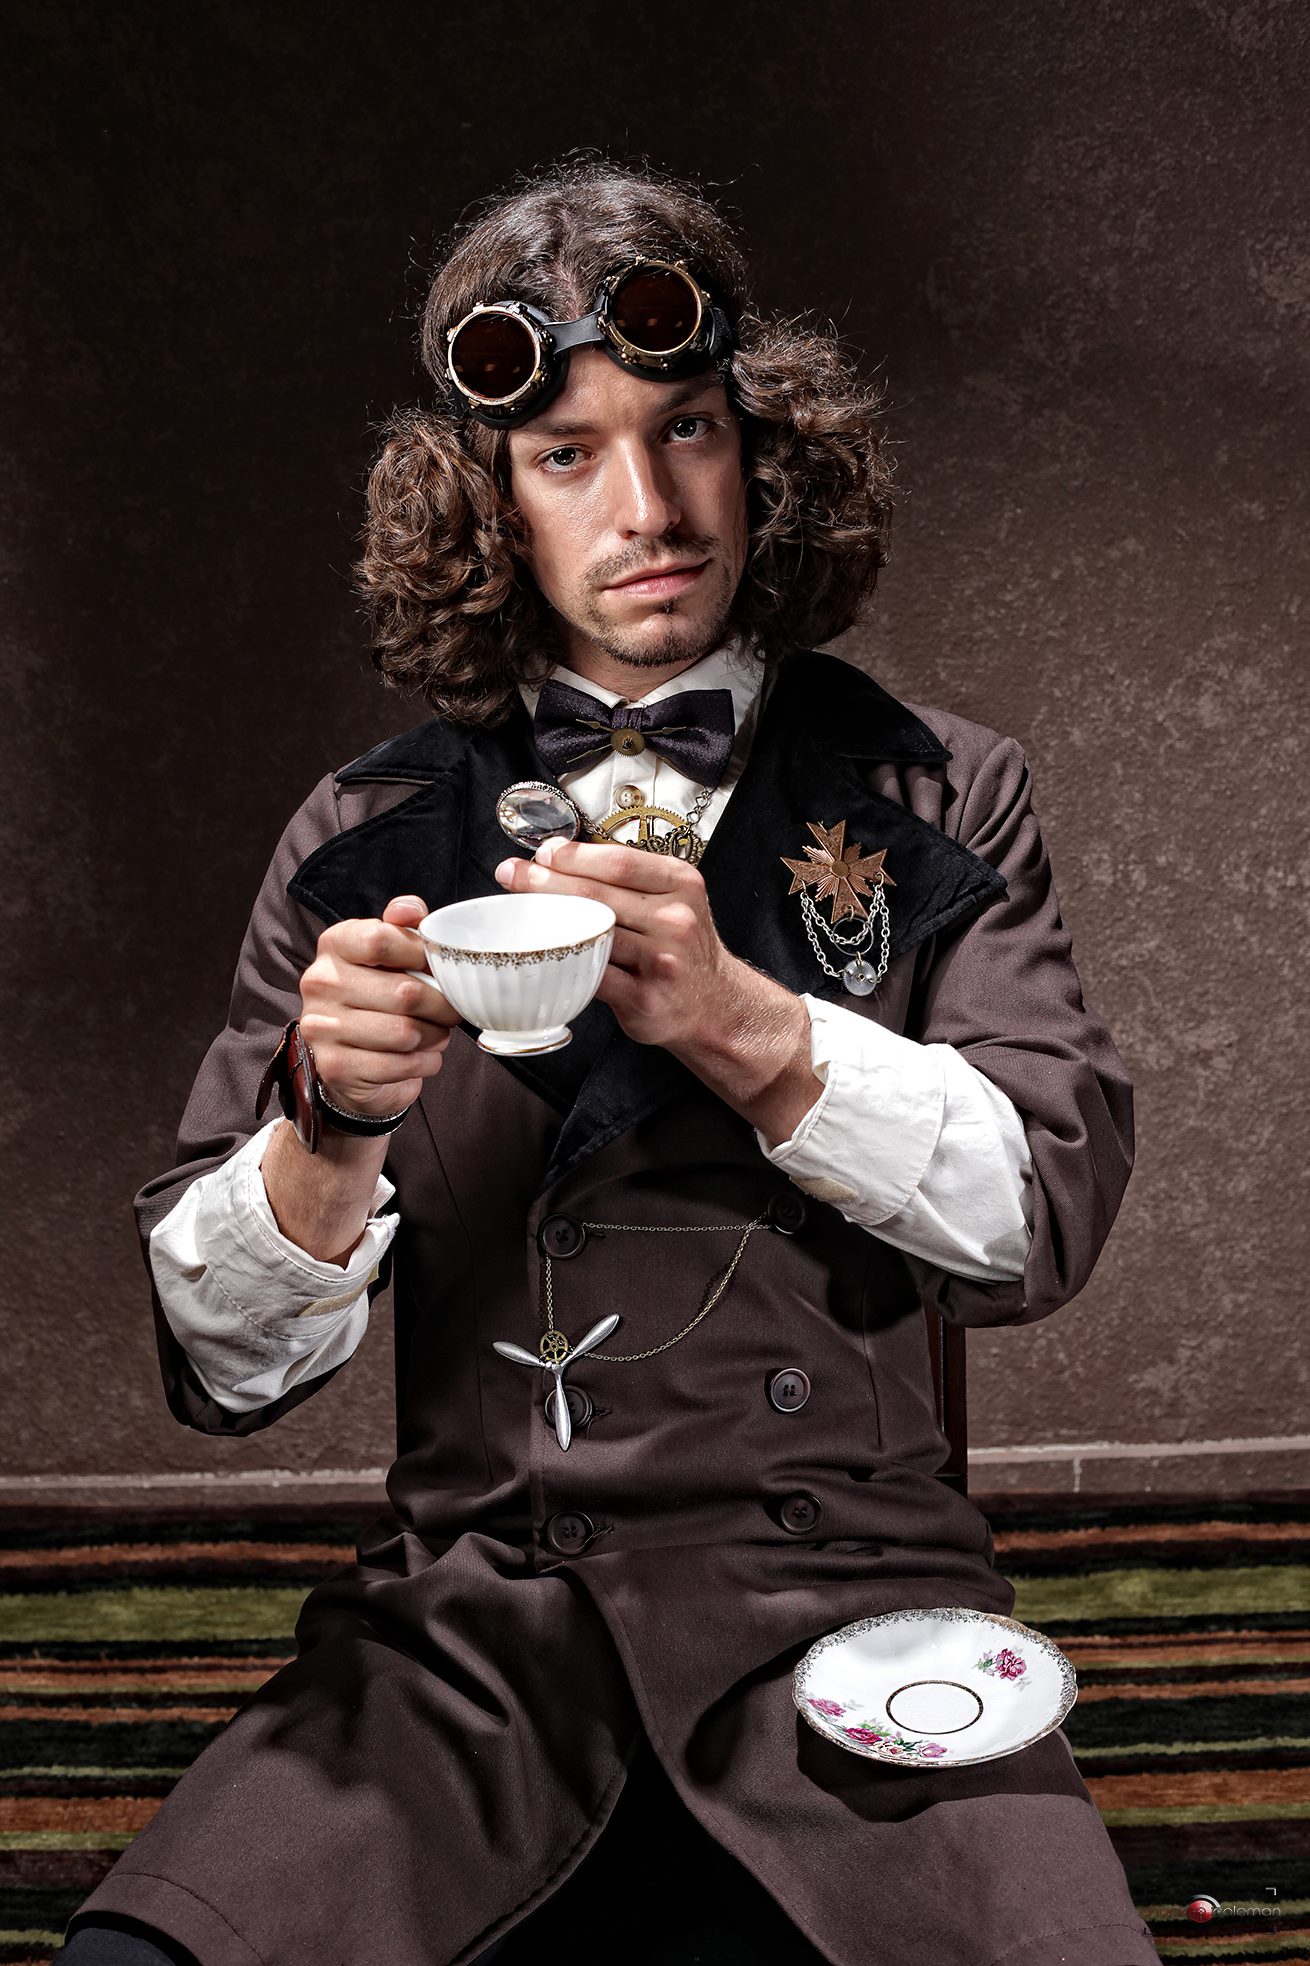
1074457_399319886845289_768851215_oTime for tea? Why I don't mind if I do! Pictured above is the Airship Propeller Necklace, Tim-Traveler's wrist watch, Steampunk Medal, Keyhole Gear Lariat, and the Tick-Tock Bow Tie! Does he look like an Earl Gray to you? (Pardon the pun! It was too delicious to resist!)

1075450_398669153577029_936443597_oThis dapper dame is wearing the Aunte Mame Bowler (my mom's favorite) and a pair of dangly gearrings! Isn't she fabulous?!

1077166_399277090182902_773196526_oAnd last, well for now--I will be posting these pictures and more on my gallery page, is this wonderful photo! Pictured on the gentlemen are two Royal Crest Steampunk Medals and a Royal Steampunk Medallion. On the lovely lady, is the Golden Gear Cameo Necklace, Compass Bracelet, Gearrings, Time Conductor's Top Hat, and of coarse, the skeleton umbrella!

Thanks again to Chuck Coleman, to all of the fabulous models, and to all of the other artists who collaborated to make this shoot possible! Now, off to make more steampunk treasures!

Style Me Steampunk: Shopkeeper's Daughter

FashionSamantha Extance1 Comment

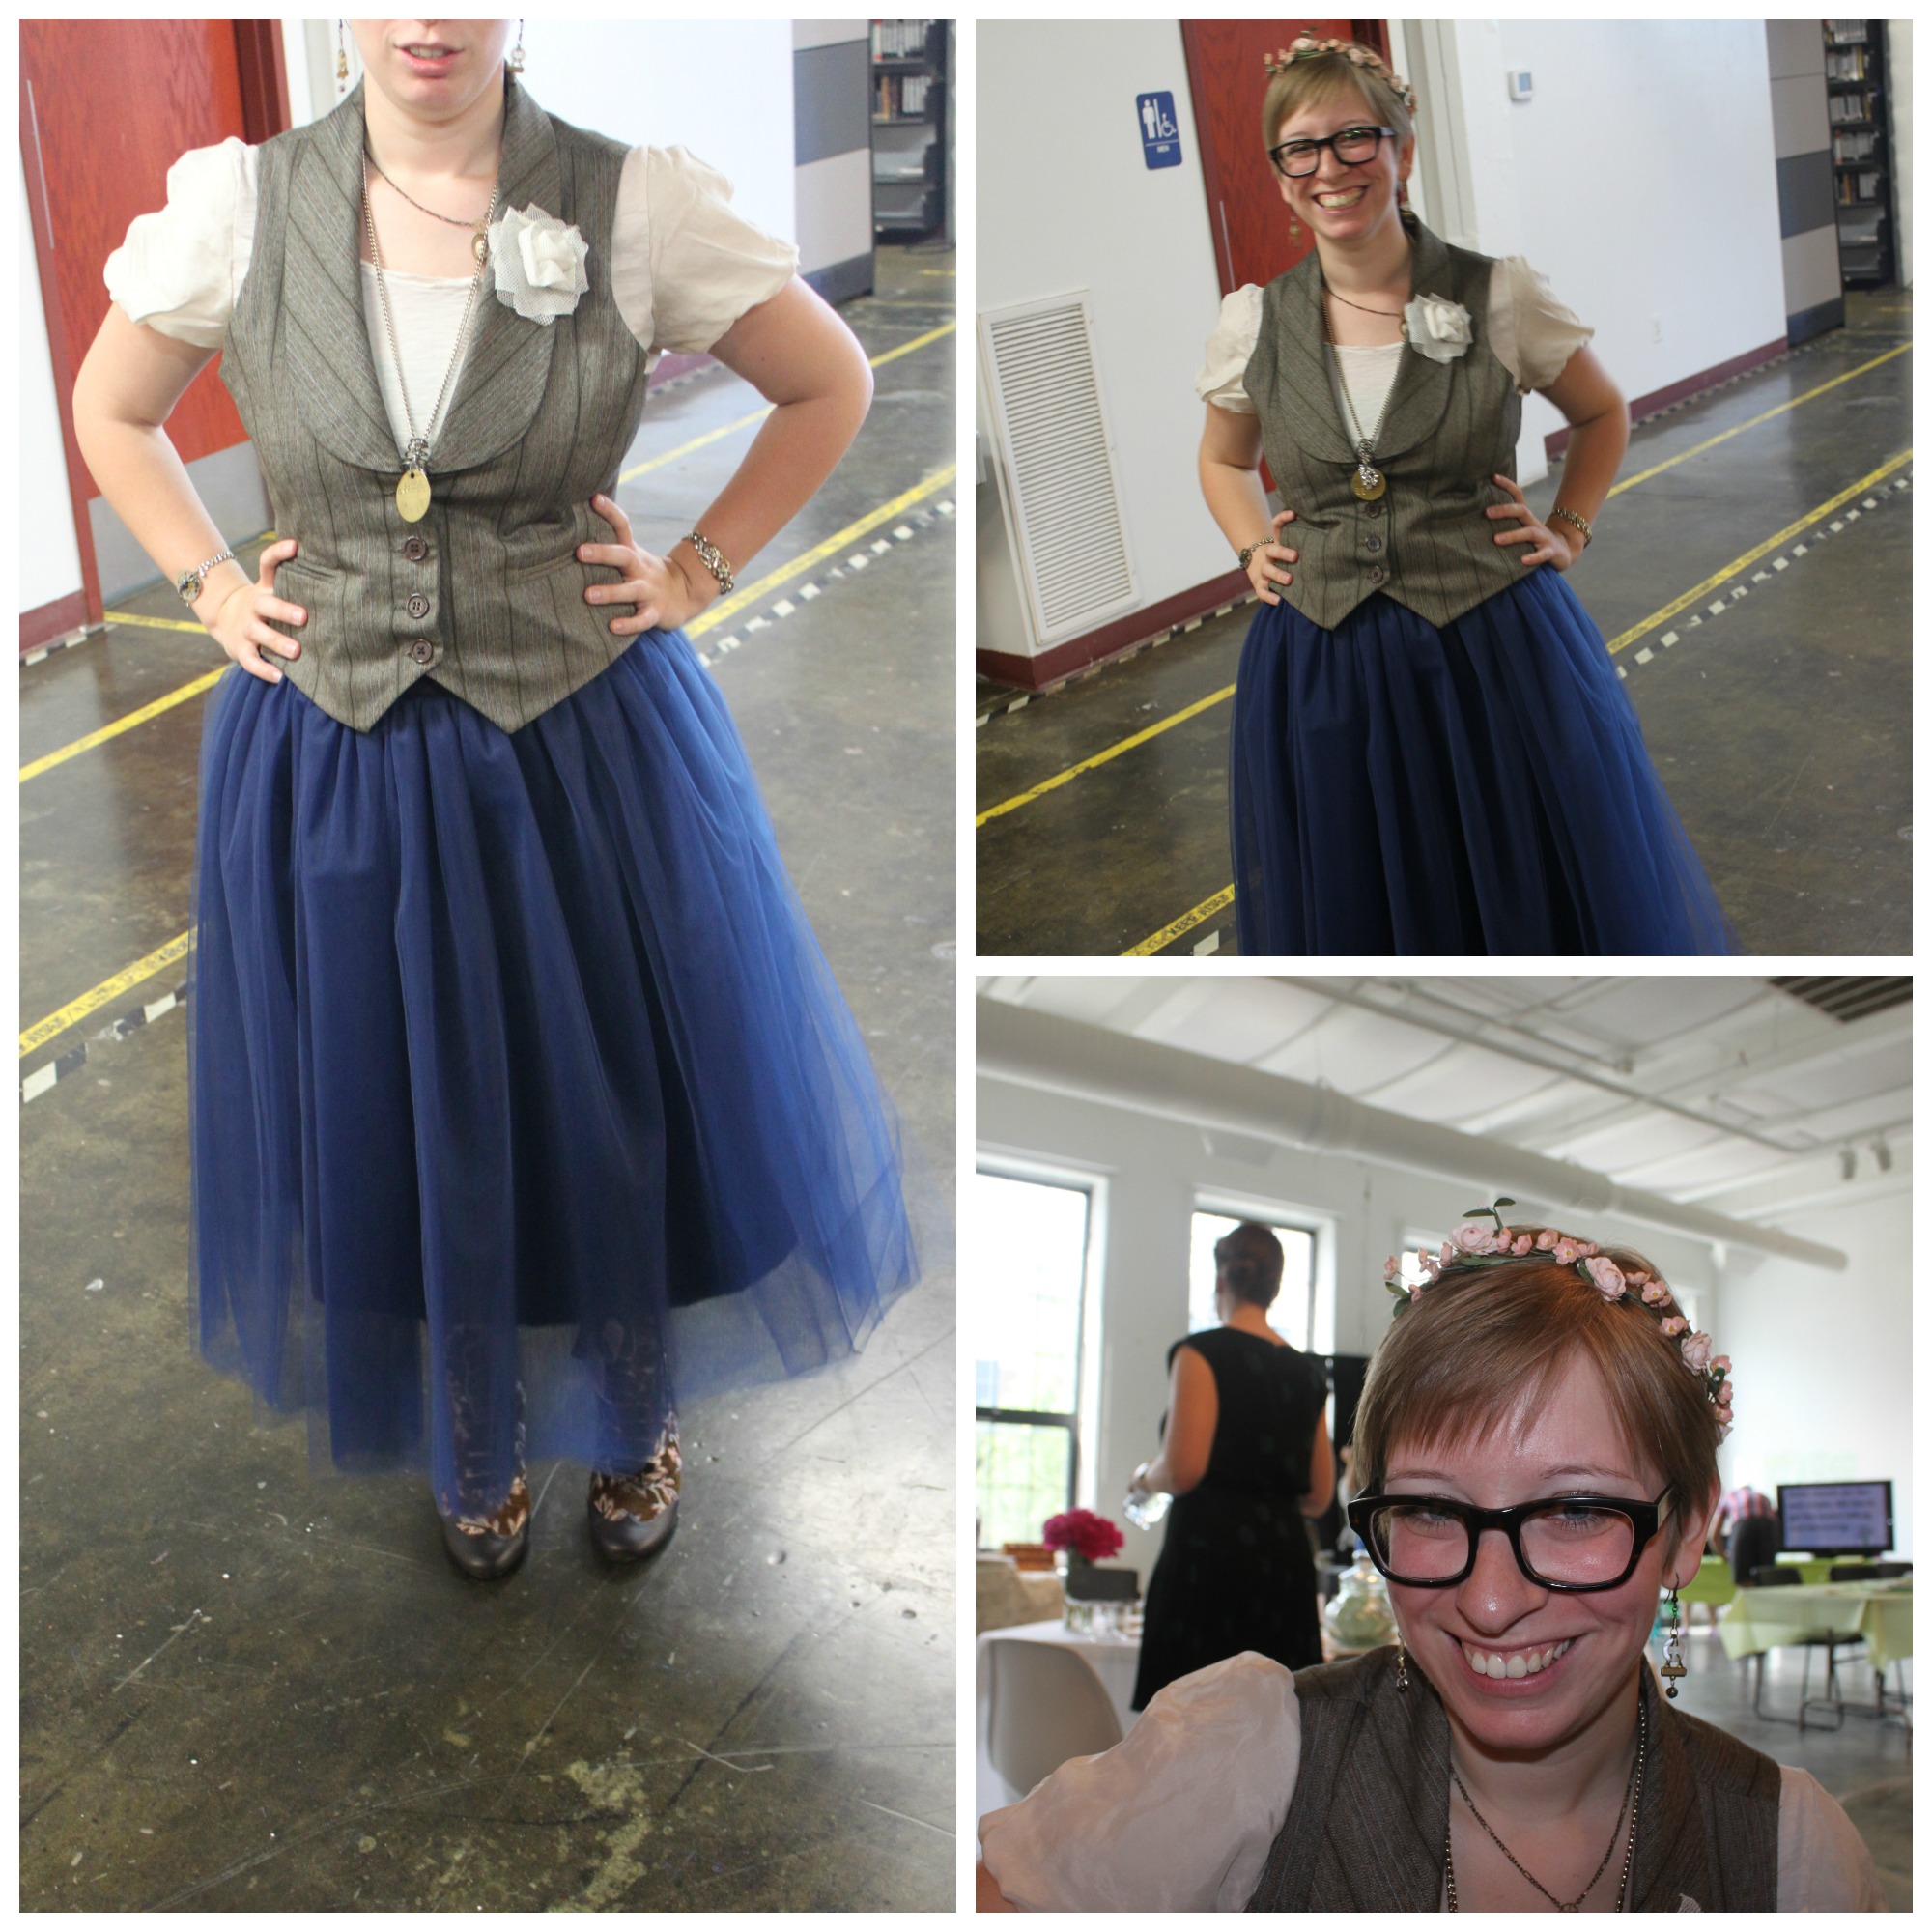
I love steampunk fashion & accessories–in fact, I love these 2 things so much that I cannot relegate them solely to cons, shows, or Halloween. “Style me Steampunk” is a series of blog posts on how to infuse your everyday wardrobe with a steampunk flair. From dressy to casual, office appropriate attire to outfits you can wear when you paint the town red–I will offer up ideas for outfits that will hopefully inspire some of you to dip into your closet and get creative!steampunk fashion 1 Style me Steampunk: The Shopkeeper's Daughter

A while back I created a look called the Steampunk Ballerina--the Shopkeeper's Daughter is very similar in that it involves wearing a full tulle skirt. This look is a lot fancier and is a great outfit for dress-up occasions.  To recreate this look here's what you'll need:

  • Tulle Skirt (there are a number of clothing companies that have similar style skirts right now. They are en vogue right now) I purchased mine from Shabby Apple's Fete de Fleurs collection. Right now they have a number of cute colors to choose from--white, pale pink, and blue (as seen above).
  • Vest (that complements the color of your skirt) Mine's thrifted--my very favorite kind of clothing!
  • Blouse (preferably with decorative or fancy sleeves) Choose a neutral color that will go well with both your vest & shirt
  • Fabric Flower (for your lapel) I made mine following a DIY I found on Pinterest
  • Poetic License Floral Tapestry Boots (love, love, love these boots) I wrote an earlier post about how to incorporate these boots into your look.
  • Steampunk Jewelry (made mine! Check out my Etsy shop for bling of your own)IMG_6906
  • Vintage or Antique flowers (to adorn your luscious locks) I fastened mine with bobby pins.IMG_7911 closeHave fun rummaging through your closet my fellow steampunk fashionistas!

Broken Eyelash Dream, A Royal Steampunk Wedding Fashion Collection!

Fashion, ShowsSamantha Extance2 Comments

Few people know how much of a wedding geek I can be but I'm finally ready to admit it--I nerd out over weddings, well handmade weddings mostly.  I love the attention to detail and most importantly the attention to the happy couple's story. It's no surprise that I've been asked to be a maid of honor (twice now!), and a bridesmaid (I won't admit how many times but I might give Katherine Heigel's character in 27 Dresses a run for her money).Steampunk Wedding Fashion 1 When Marry Me Indie approached me about putting together a collection for their indie, handmade wedding show I was certainly up for the challenge (and I certainly wanted the chance to upcycle all of those bridesmaids' dresses hanging in the back of my closet). I transformed each dress into a simply steampunk creation--both tasteful and elegant. I can't wait to share how I did it in a few DIYs to come later this month (so stay tuned)!Steampunk Fashion 2

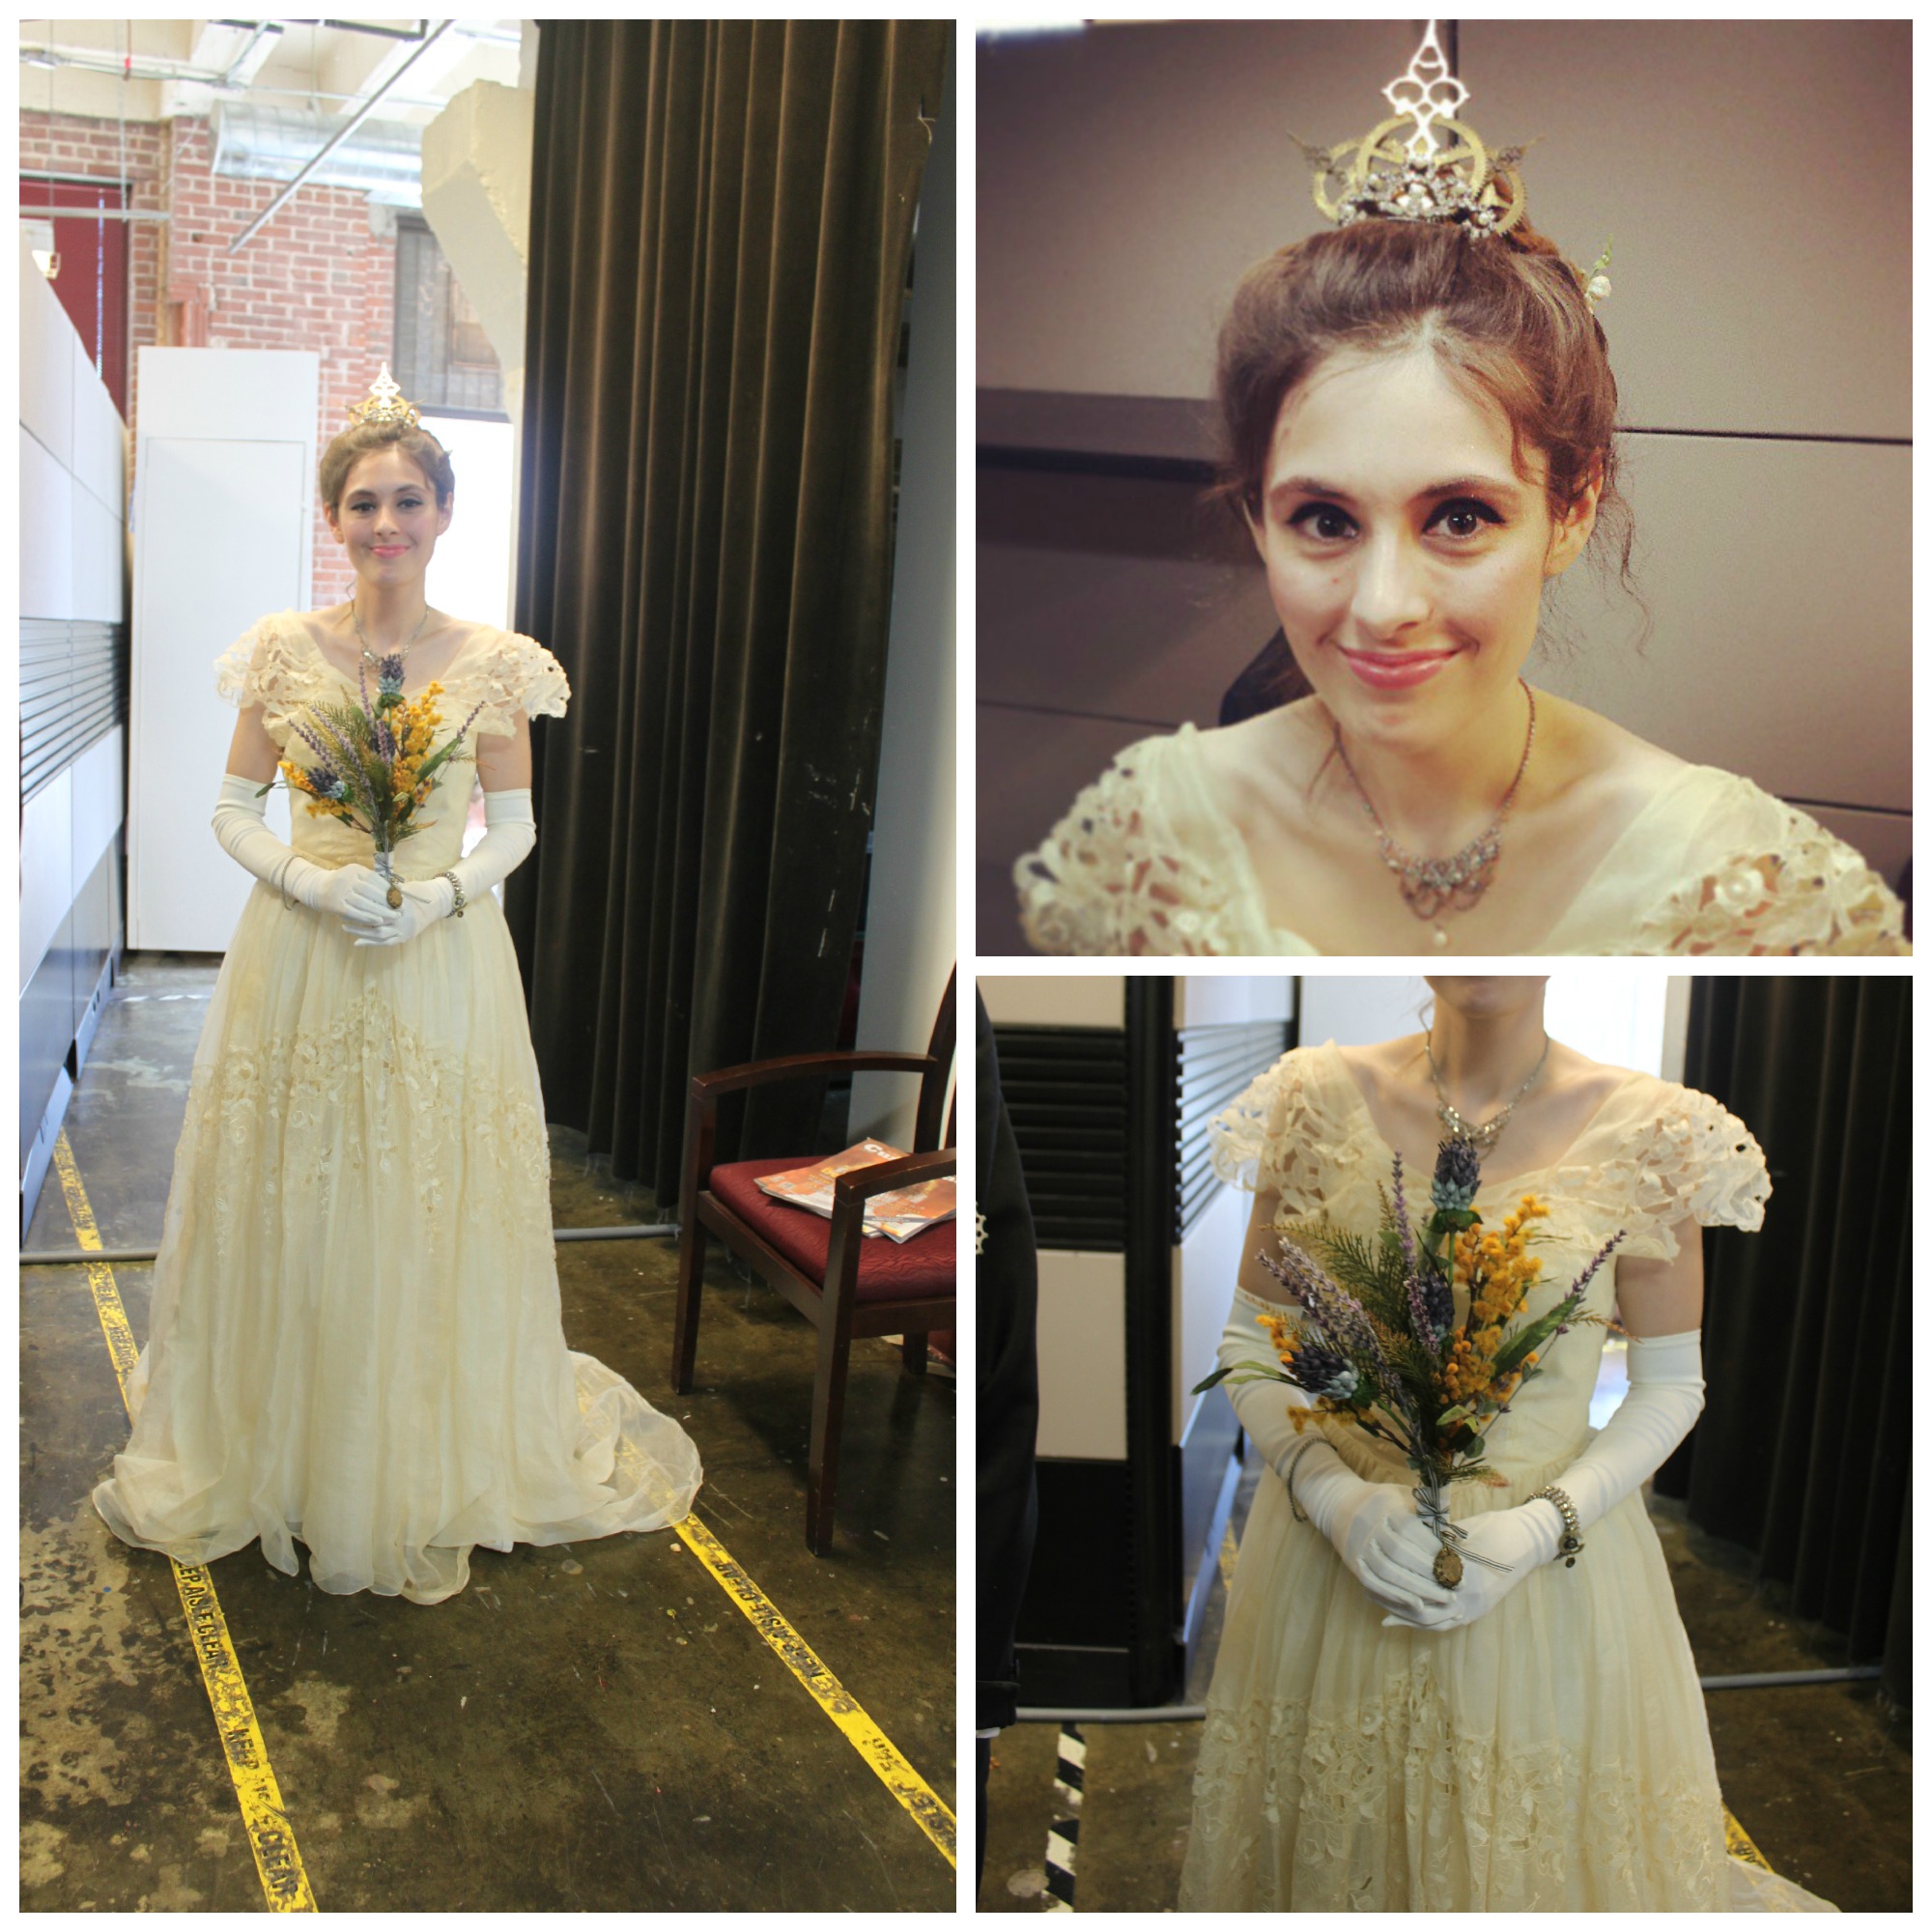
I had so much fun transforming each of the dresses, thrifting for vintage tuxes, and the piece de resistance came from my mom who found (at an estate) the most exquisite wedding dress I have ever seen. It is an off-the-shoulder dress made of gauzy white handmade lace with a long flowing train. It was sold with white ballet shoes (still with a penny for good luck taped into the inner sole)!Steampunk Fashion 3

Accessorizing was easy--I was inspired by vintage rhinestone pieces, gleaming brass gears, and these embroidered Royal crests & patches. I had so much fun ruffling through antique photographs of Victorian weddings and ogling all of the dresses, floral arrangements & nosegays.

When June 1st finally arrived I could hardly contain my excitement! Everything had fallen into place  and sure there were a couple of hiccups but the show was a complete success (much like a wedding day I expect). I couldn't have done it without the encouragement of Christine & Renee; the help of all of my wonderful models--Melissa, Joe, Michael, Karen, Caroline, Ryan, Mitch, and especially Alicia (who was such a hauntingly beautiful bride--she looked as if she had stepped out of a shroud of ghostly invisibility to corporeal form to remind us of a bygone era); the help of Sherri, who filmed the fashion show for me; and last, but not least, my collaborator and co-designer, my mom (The Salvage Steamstress).Steampunk Bride

So for those of you who couldn't make it--here's a video of the show. Hope you enjoy it!

[youtube=http://www.youtube.com/watch?v=Nxc_DW1VsJg]

Style Me Steampunk, Simple Romance

Fashion, UncategorizedSamantha ExtanceComment

I love steampunk fashion & accessories–in fact, I love these 2 things so much that I cannot relegate them solely to cons, shows, or Halloween. “Style me Steampunk” is a series of blog posts on how to infuse your everyday wardrobe with a steampunk flair. From dressy to casual, office appropriate attire to outfits you can wear when you paint the town red–I will offer up ideas for outfits that will hopefully inspire some of you to dip into your closet and get creative! MySteampunkSyle 1Style No. 3: Simple Romance

My mom bought me these lovely tapestry Victorian style high heeled boots for Christmas and it's been challenging trying to place them with the right outfit. Most of us steampunkers have fantastic shoes; however, with other statement steampunk wear the overall look is too costume-y for everyday dress. My advice to you, when you just feel like wearing your steampunk style footwear (or really any other statement piece you own & would love to wear more) is this--let that piece be your only statement. The rest of your outfit should compliment it and also be understated. Basically, keep it simple.

For instance, my boots have an intricate floral pattern so I avoided patterns elsewhere on my clothing. I chose a pale pink dress paired with a charcoal gray knit sweater. (And because I like my outfits a little funky, I wore some brown argyle tights to pick up the brown hue of my boots' soles).

Accessories are always a must! I wore very simple and dainty jewelry--a pair of washer & pearl earrings and a single cog necklace on fine chain. With statement pieces, avoid wearing statement jewelry as it may make you look costume-y.

I like to call this overall look "Simple Romance" because I feel feminine, dainty, and simply elegant.

To Re-Create this Look:

  • Victorian Style Boots (Mine were made by a fabulous shoe company called Poetic License; the style is "Lady Victoria")
  • Chiffon pink dress (I purchased mine from H&M years ago)
  • Gray sweater (purchased from Converse, and they are currently on sale)
  • Tights (to match your boots)
  • Simple steampunk jewelry (which you can purchase from my Etsy shop)

This look would be perfect for Valentine's Day which is just around the corner!

Style me Steampunk

FashionSamantha Extance1 Comment

I love steampunk fashion & accessories–in fact, I love these 2 things so much that I cannot relegate them solely to cons, shows, or Halloween. “Style me Steampunk” is a series of blog posts on how to infuse your everyday wardrobe with a steampunk flair. From dressy to casual, office appropriate attire to outfits you can wear when you paint the town red–I will offer up ideas for outfits that will hopefully inspire some of you to dip into your closet and get creative! Style me Steampunk: The Steampunk Ballerina

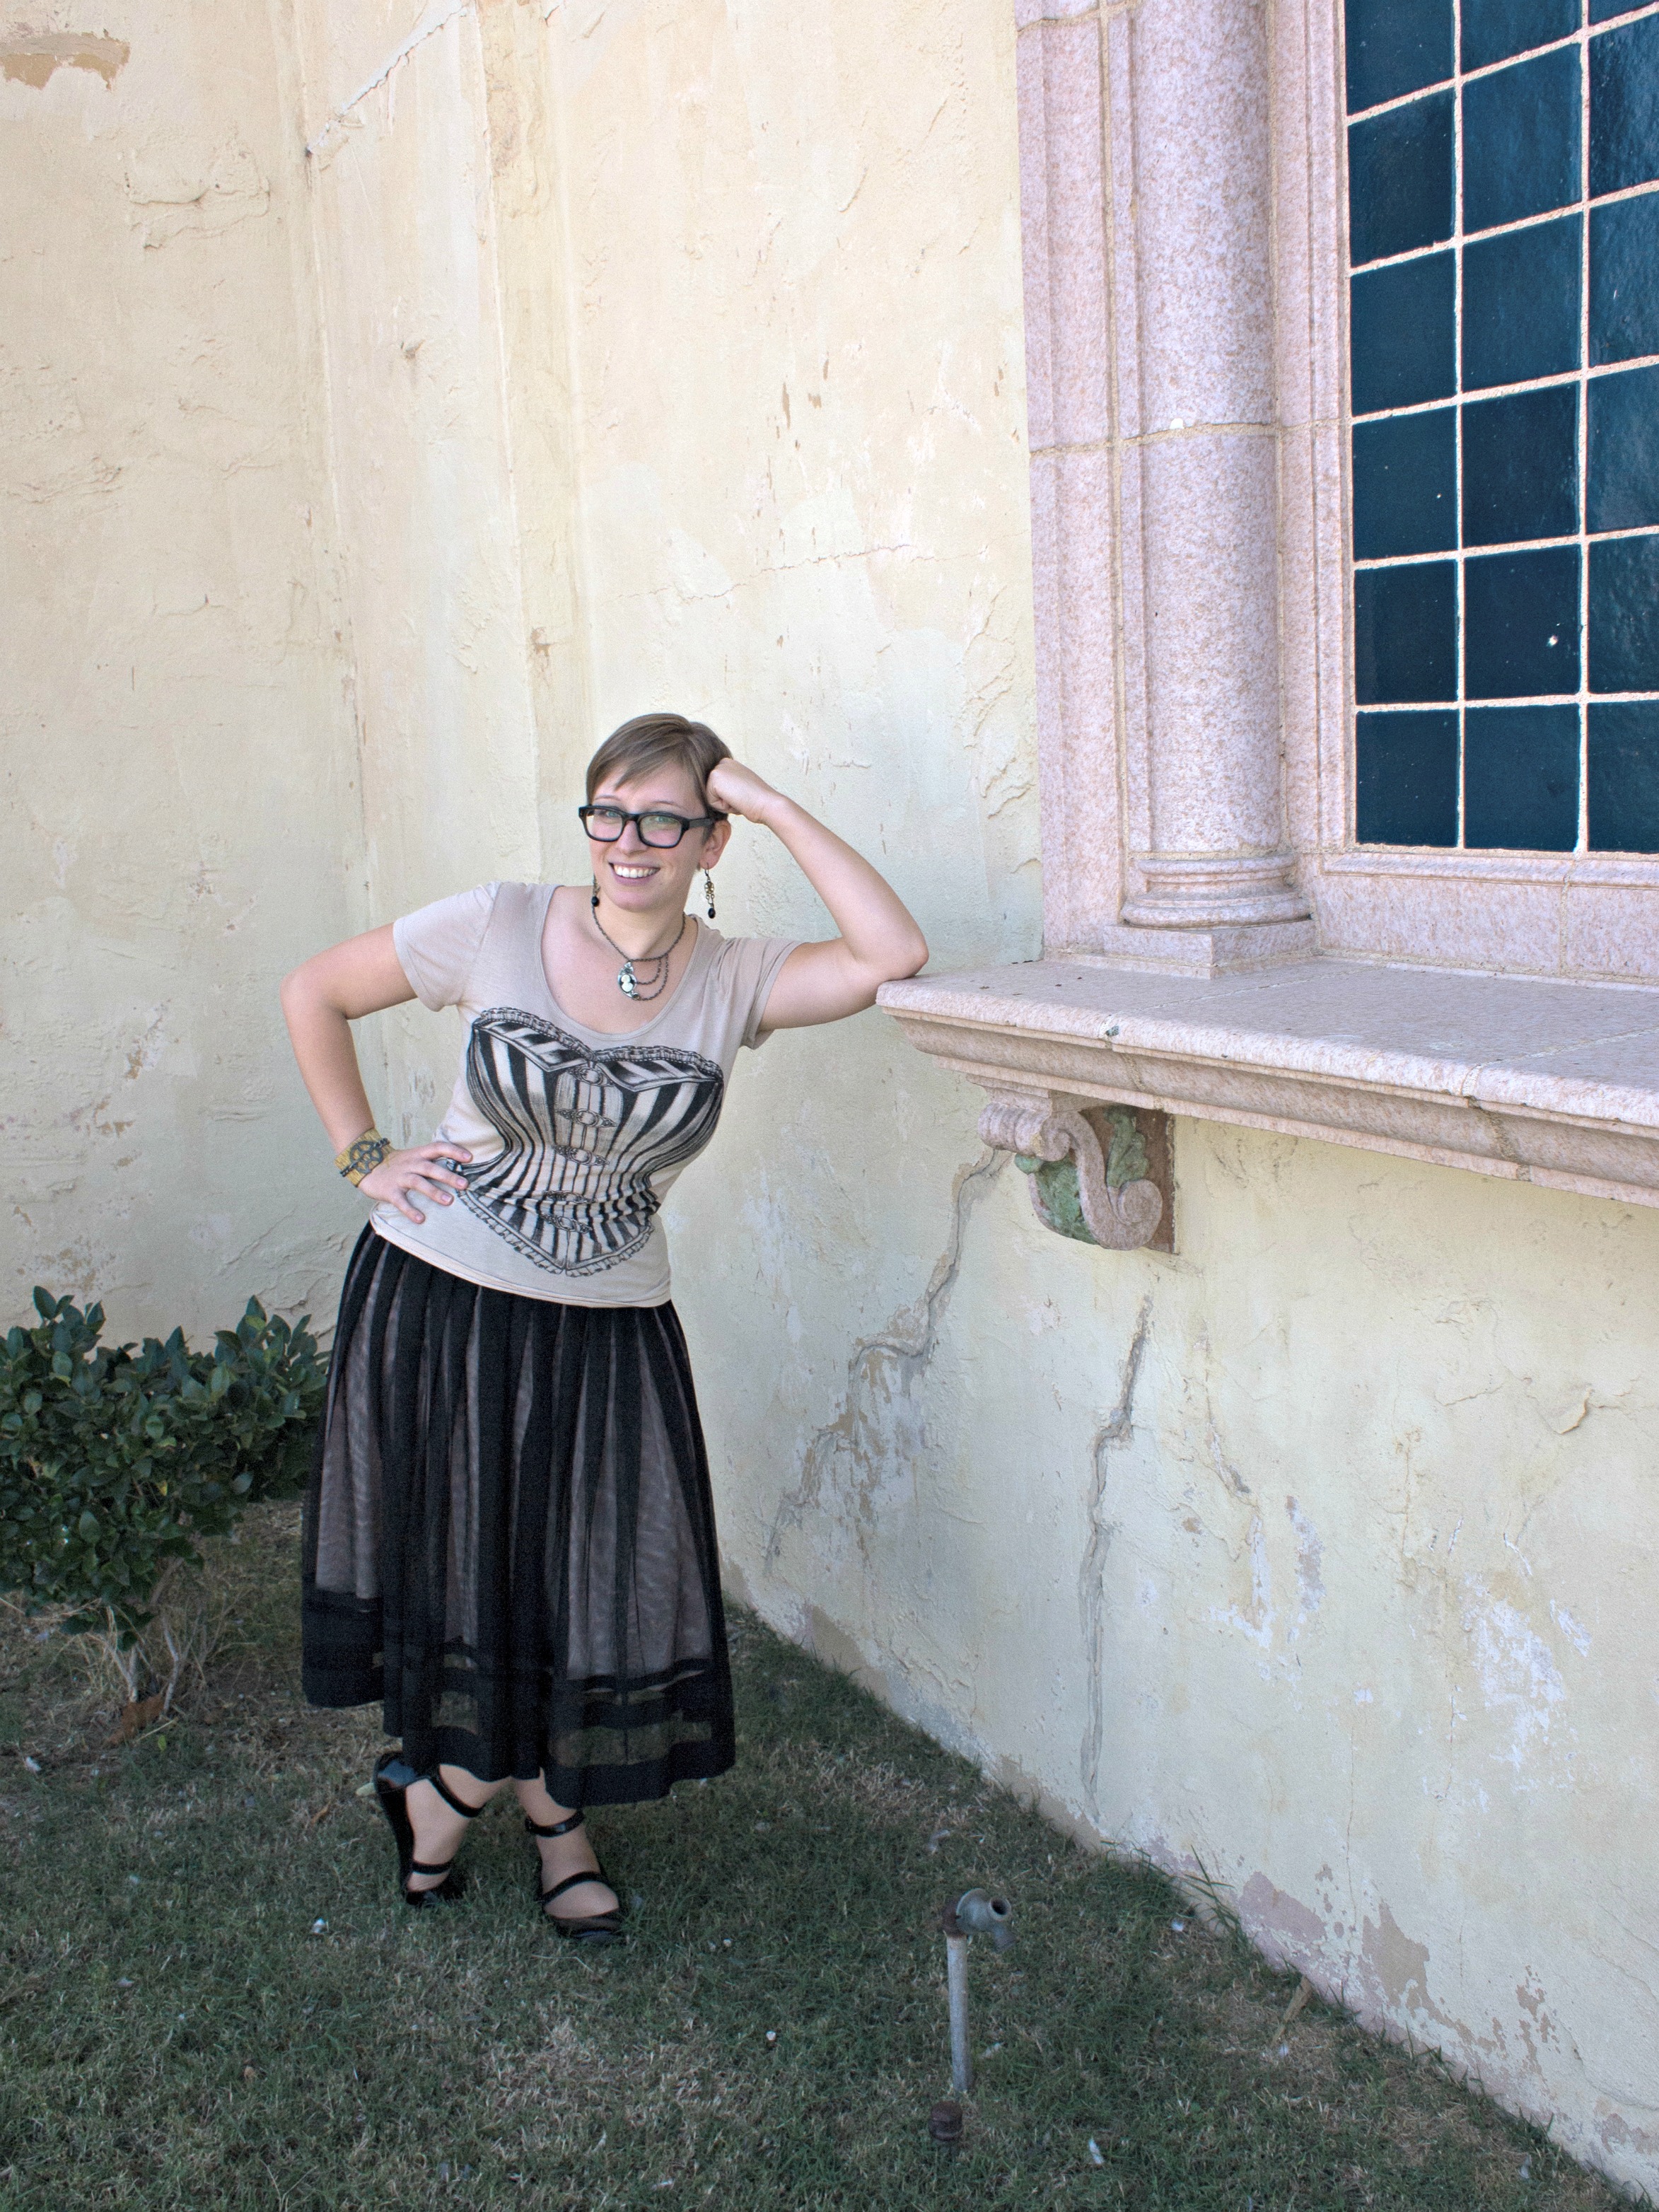
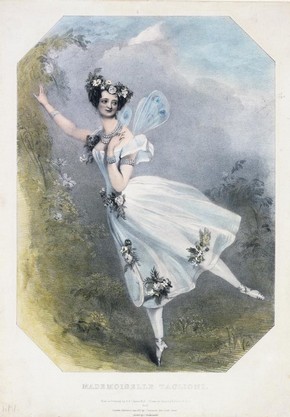
This is one of my favorite outfits--it's comfortable and easy to move around in while also not sacrificing style or a theatrical flair.  I call this look the steampunk ballerina because, to me, it resembles much of the dress that Victorian ballerinas donned on stage.

Victorian Ballerinas wore longer skirts than our modern day ballerinas (hitting roughly the shins, as depicted above) in addition they also wore corsets (or corset-resembling tops).

To re-create this look, you'll need:

  • Fossil Black Tulle Skirt (there are a number of clothing companies that have similar style skirts right now. They are en vogue this Winter)
  • Ballet flats (I particularly love ballet flats that have ankle straps or are a fusion of ballet flats and mary janes)

  • Corset t-shirt (I purchased mine from CarouselInk on Etsy--here's a link to the t-shirt. Side note on the t-shirt: it runs true to size and will not shrink when you wash it.)
  • Steampunk Jewelry (made mine! Check out my Etsy shop for bling of your own)

Costume Option: If you wanted to turn this look into a costume for a con or a party it's simple. Put on some elbow length gloves (preferably matching the color of your skirt & flats) and artfully weave flowers in your hair. Maybe even grab a fan for flirty good measure or like Marie Taglioni, you too can be a fairy with some cheap pantyhose wings (spruce 'em up and draw gears & cogs on them and then glue rhinestones over your drawn lines)!

You can't see it because it's covered by my other hand but when I entered The Girlie Show in OKC they marked my hand with an "X"--it perfectly matched the color of my cuff. I had a beautiful golden X and was serendipitously styled that day!  Have fun creating this look, wear it fiercely!

Style me Steampunk

FashionSamantha ExtanceComment

I love steampunk fashion & accessories--in fact, I love these 2 things so much that I cannot relegate them solely to cons, shows, or Halloween. "Style me Steampunk" is a new series of blog posts that I'll be writing on how to infuse your everyday wardrobe with a steampunk flair. From dressy to casual, office appropriate attire to outfits you can wear when you paint the town red--I will offer up ideas for outfits that will hopefully inspire some of you to dip into your closet and get creative!

Style me Steampunk: Comfy & Casual, the Adventurer's Ensemble

  • Hiking pants, rolled up to accentuate the boots
  • Mossimo Supply Co. Wool Ankle Boots
  • Black Converse vest
  • Grey T-Shirt

This outfit alone would not be steampunk were it not for the accessories. Choose your accessories thoughtfully. The outfit I am wearing is ready for adventure. Accenting this aspect of the clothing, and further creating my outfit's character--the adventurer, I wore a black leather compass bracelet, simple black button & washer earrings, and a time traveler's necklace (on black chain).

Matching your accessories and jewelry (each of my pieces were either all black or had an element of black in them) to an article of clothing (in this case, the black Converse vest) can help make your outfit more cohesive.

Not all steampunk outfits have to be over-the-top, as this casual, comfortable (and travel friendly might I add) look proves.


DIY Steampunk Crown & DIY Steampunk Pirate Queen Costume for Halloween

D-I-Y-Samantha ExtanceComment

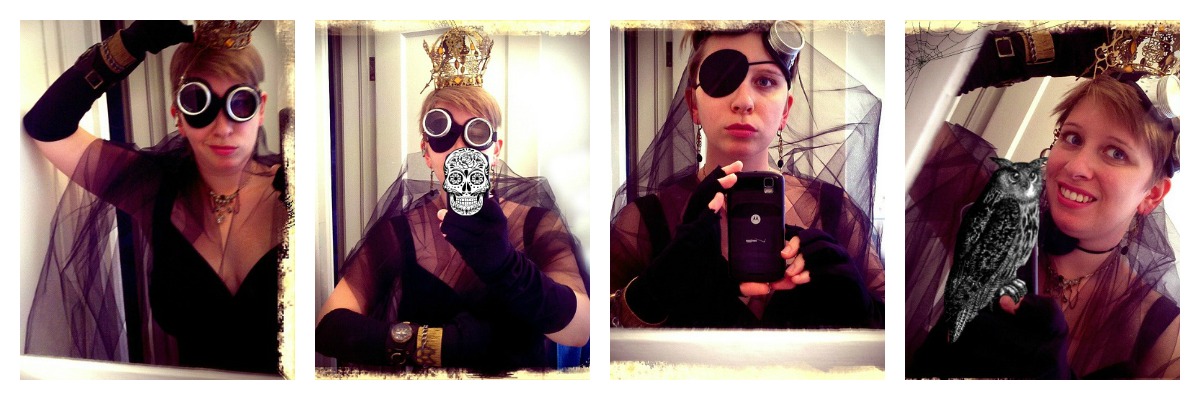
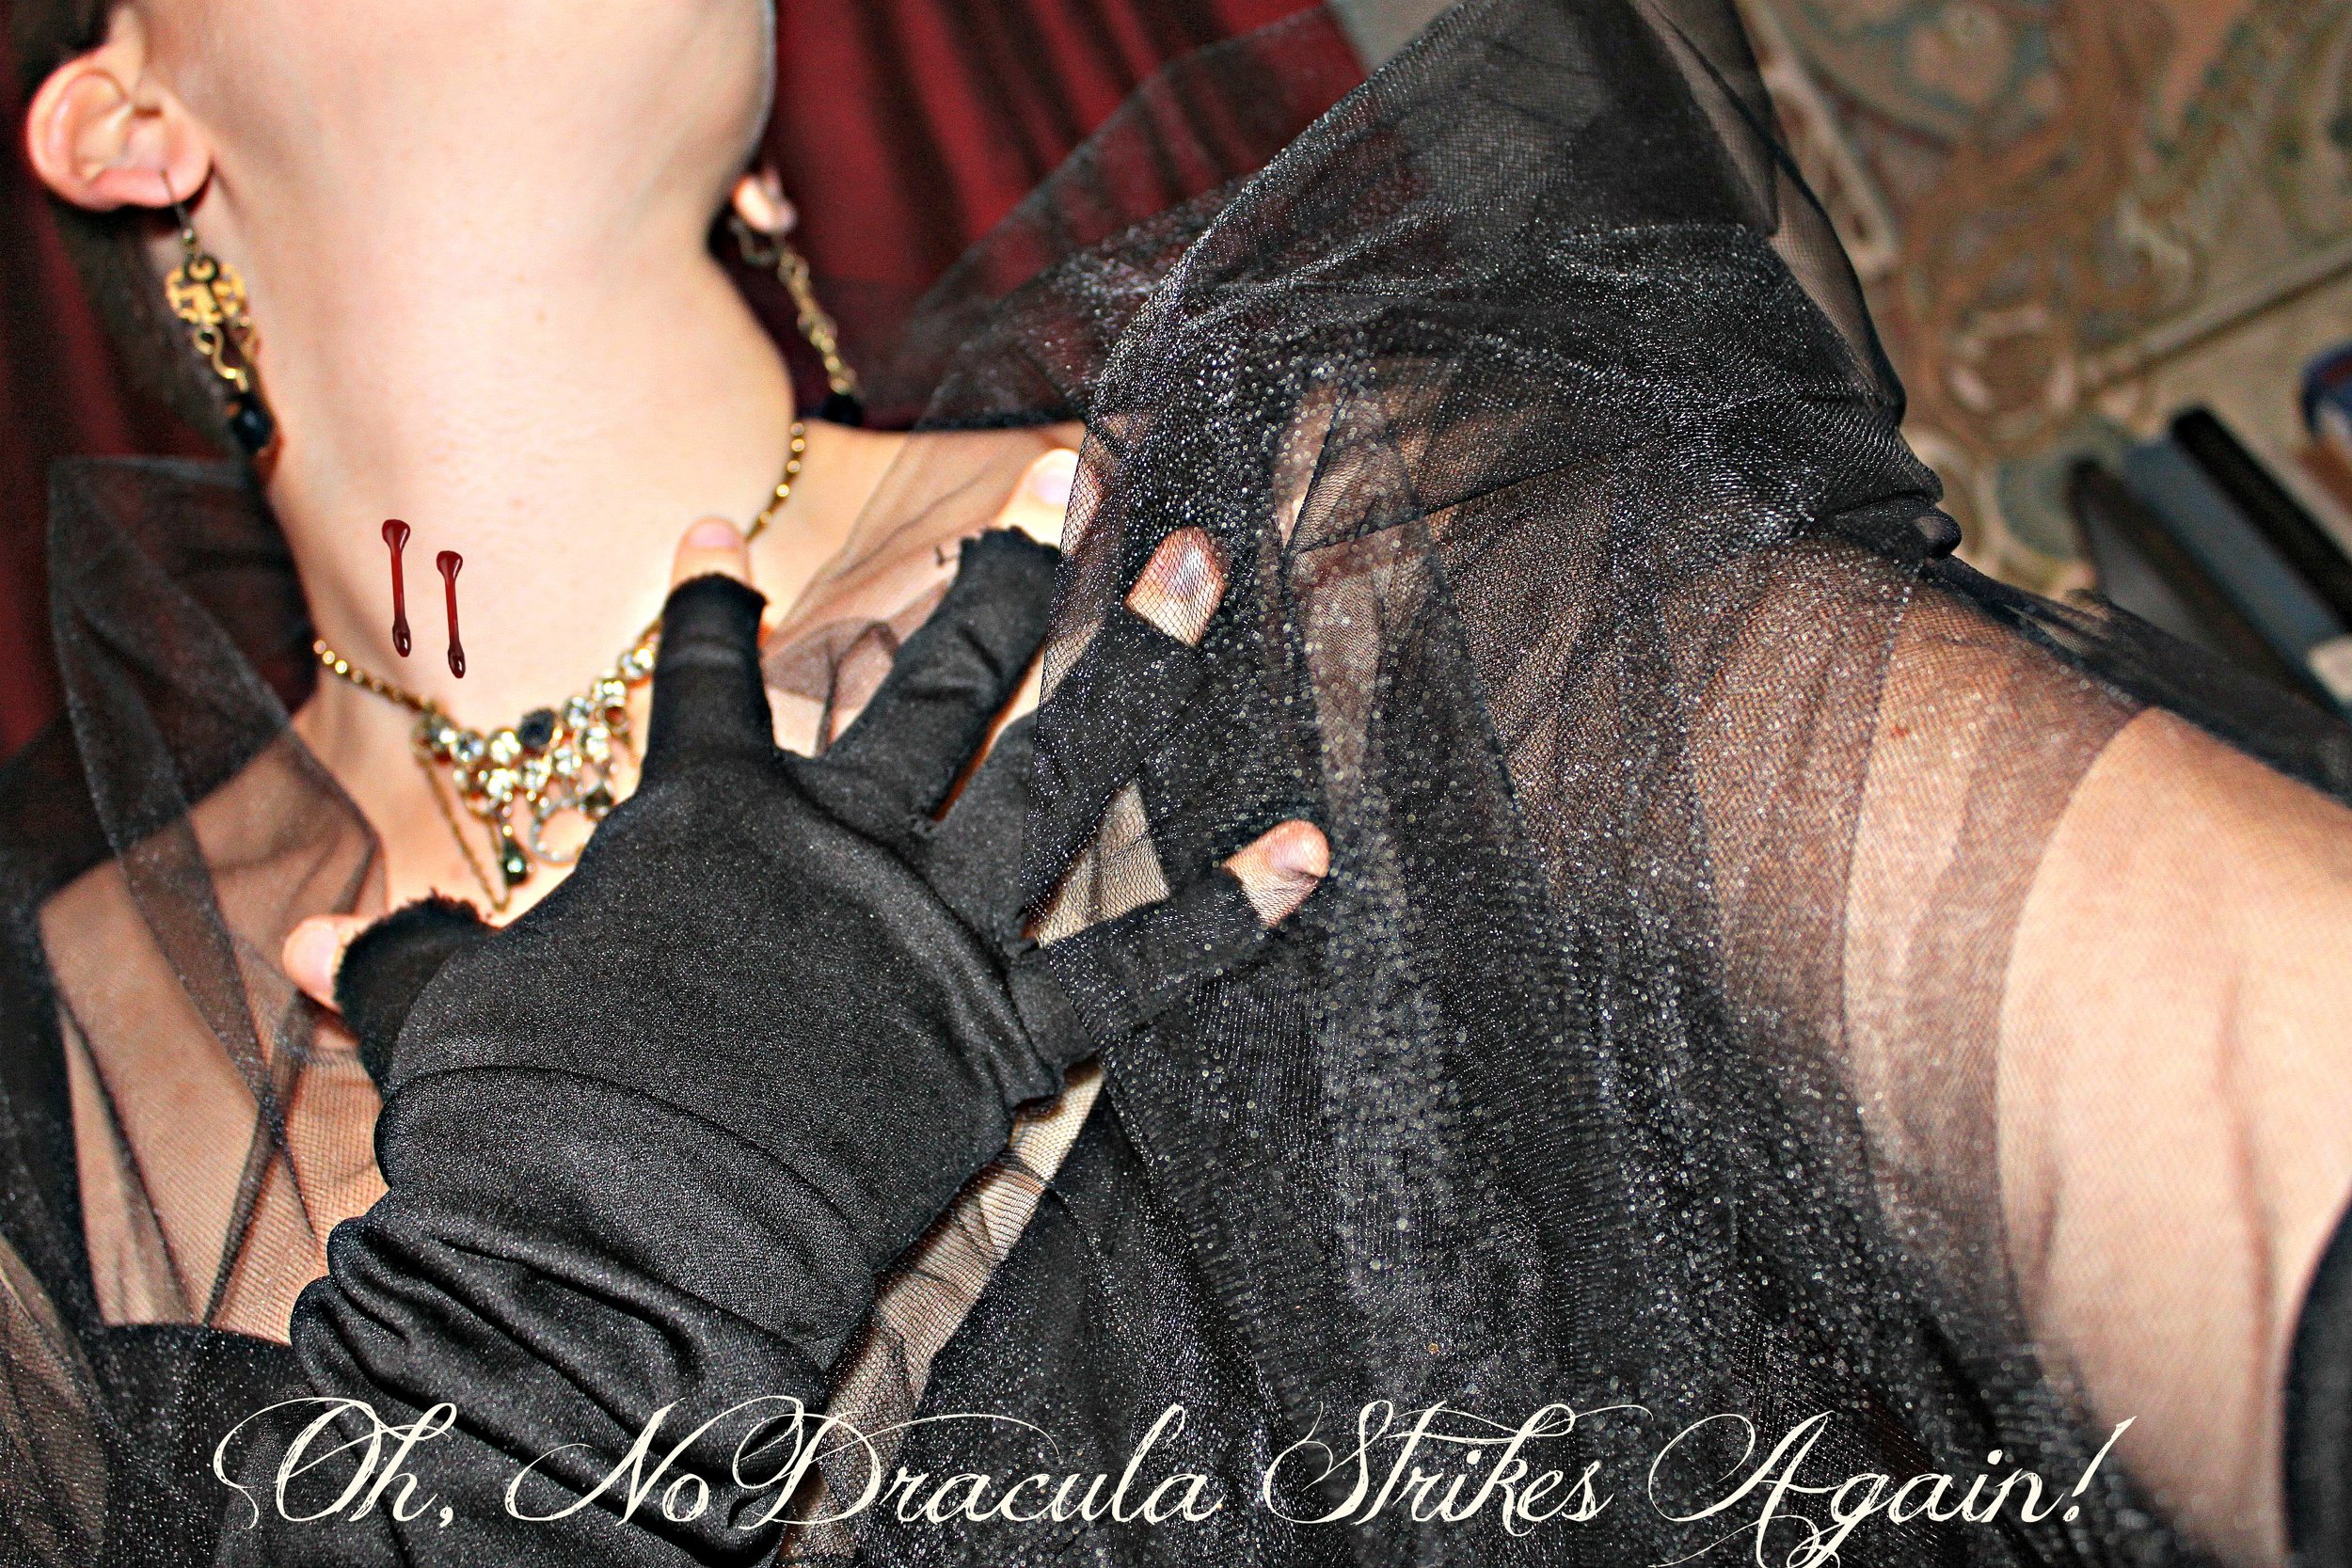
Like me I know a lot of you are making your own costumes not only for the fun of it but also because of your budget. Here is a DIY Steampunk Halloween costume that costs under $100 (and even less if you have some of these items already). Be a Steampunk Pirate Queen this Halloween (or Empress or Imperial Majesty...whichever title you prefer, after all you're the ruler).

(Forgive the phone in the mirror shooting--I did cover the phone up with some spooky overlays--check out PicMonkey's Halloween themes to edit pictures with! It's super fun & festive!)

Here's what you'll need:

  • A fancy dress (Now is the perfect time to dig up that unworn dress sitting lonely in the closet or that bridesmaids dress that you haven't put on since the wedding). If you don't have a dress, try pursing your local thrift stores for dresses. Steampunking it is easy with accessories and a little tulle! Don't worry if your dress is short--punk it up with your favorite pair of Fall/Winter boots! (Already Owned, hopefully)
  • Tulle (approximately 2-3 yards, depending on your size and how long you'd like it to trail after you). I'm a size 14 and so I purchased 2 yards. Tulle is cheap at Joann Fabrics during Halloween (go when you have a coupon)! $2.00
  • Elbow-Length Gloves (you can source these from anywhere, thrift stores or a cheap Halloween shop). I made my gloves fingerless but cutting off the ends. $12.99
  • Eye patch (any Halloween shop or Dollar Store has an eye patch you can purchase pretty cheaply) I bought mine at Party City where I also found my elbow length gloves. $1.99
  • Goggles (This may be harder to find than other items but check your local flea markets, estate sales, & thrift stores--which may have goggles for lower prices). My favorite pair of reproduction goggles is made by Restoration Hardware, click here to purchase or view their "German Goggles" in the RH online catalog. These goggles are simple, elegant, and relatively inexpensive. $24.99
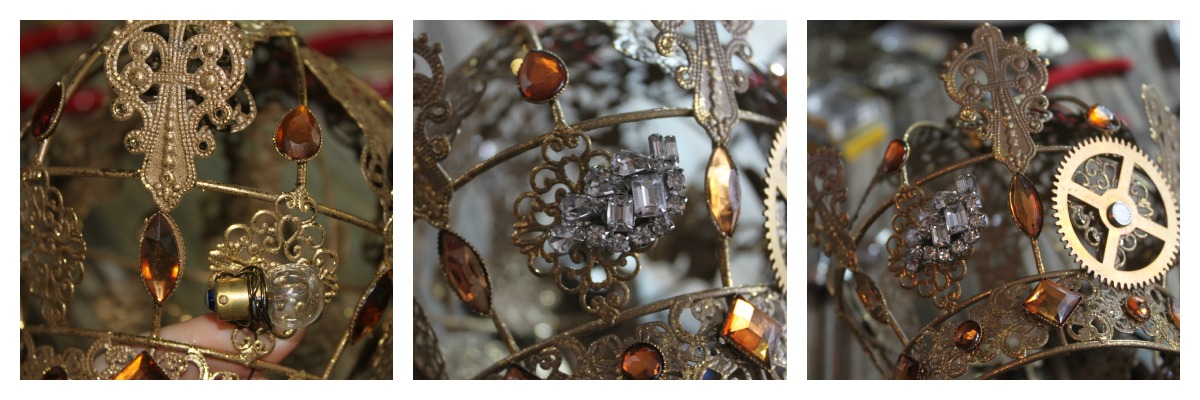
  • Crown (or Large Christmas Tree Crown Ornament) The crown I am wearing is actually a Christmas Tree ornament that I purchased at a local shop, Garden Ridge (in their Gold Ornaments aisle). The DIY to make your own crown from a Christmas Tree ornament is below. Keep reading! $4.99 (Gears & Brads to adorn it with: approximately $14.99)
  • Steampunk Jewelry (or any mismatched metal & chain jewelry that you own already) Some of you I know already own a few of my pieces (thanks!)--mix & match them with other rhinestone or bling-ish jewelry you own to add a little sparkle. (Already owned or you can click here for my Etsy shop and find something to go with your costume!)

Total Cost (excluding a dress & jewelry): $61.95

The most important part of your costume...airship pirate's attitude. A Queen still gives her mateys a mightly Argh!!
DIY Steampunk Crown

Materials & Tools:

  • Crown Ornament (a filigree metal crown is best since it has many holes in it already) ($4.99)
  • Brads ($4.99)
  • 1-2 packages of reproduction metal gears ($5.99 each at Michaels--try their "Found Objects" or "Industrial Chic" brands) or salvaged machine or gear parts (preferable, sourced from local flea markets, estate sales & such)
  • Light bulbs (optional)
  • Rhinestone clip-on earrings (optional)
  • 2 Grandfather clock hands (optional)
  • Small magnifying glass & chain (optional)
  • Wire (as close to the color of your crown) & wire cutters (for attaching light bulbs)
  • Pair of flat nosed pliers

Steps:

1) If your ornament has any hooks or ribbons for hanging on the Christmas tree, remove them or cut the ribbons. Here's what mine looks like:

2) Next, lay out the items you wish to attach to your crown & begin placing them. Gears can be attached with brads through the holes in the crown's filigree. Secure them by prying apart the two ends of the brad so that they hold the gear in place. You may want to crimp the brad shut with a pair of flat nosed pliers (or any kind of flat pliers).

3) (Optional) To secure a light bulb to your crown, cut a length of wire (proportional to your bulb's size. For  tiny bulbs, approx. 1 inch) & loop the wire around the bulb through the filigree and back through again & around (Like sewing stitches) until the bulb is secure. Another option is to secure the light bulb in place with glue & a glue gun.

4) (Optional) For extra sparkle on your crown, add a rhinestone (or any sparkly gemstone) clip-on earring. The clip should hold, but if your earring is old and the fastener is loose you may want to secure it with a bit of wire (approximately 1/2 inch will suffice).

5) (Optional, but highly suggested) To attach your grandfather clock hands, use brads and secure in place with pliers as instructed in Step 2 above. If your grandfather clock hands are heavier and cannot be kept in place with brads, use a small screw, washer, & nut to hold it in place. A great selection can be found in the Science Projects section at Lowes or Home Depot in the Hardware section.

6) (Optional) To add a monocle, attach a length of chain (measure where you'd like it to fall--keep in mind it will whip you in the face so I'd advise to make it longer than eye-length. A good zone is between the bottom of your nose to your chin). Using a jump ring  attach the chain to a small magnifying glass (available at some dollar stores & grocery stores; available at bead shops, like the Bead Merchant on 15th street & Delaware). Using another jump ring, attach the other end of the chain to your crown with your pliers. You can dress up your magnifying glass chain as I did above by adding crystal beads & a piece of filigree!

7) Once you have attached all of your embellishments to your crown, wear proudly!

Other Ideas for Accessories: Faux-fur, a Sceptor, A Sword (for Knighting your minions), a Queenly cape, & a dance card

Have fun crafting your costumes! If any of you decide to be a Steampunk Pirate Queen please post or email your pictures to bohemianromancejewelry@gmail.com I'd love to see them! Check in later this week to find out how to Steampunk your Pumpkins!

Dark Carnivale~Bohemian Romance & The Salvage Steamstress Fashion Show

ShowsSamantha Extance1 Comment

Saturday, Sept. 29th, at Indie Emporium, was my very first fashion show! I styled the models myself and created unique jewelry pieces to compliment my mom's, the Salvage Steamstress, fantastical hats! We had a blast! I can certainly say that out of all the models & designers waiting backstage--we had to most fun! Playing with our props, tipping our hats to one another and just generally being goofy. This sense of playfulness carried over into the show (for which I am very glad). For those of you who missed it, here are a few photos that were taken n the runway!

Here is Caroline wearing the Lady Hawke Top Hat, gearrings, and LadyIron Gear Necklace. At the end of the runway, Caroline activated her prop--a beaded skeleton parasol.

Confidently, Caroline walked back up the runway, tipping her hat to Renee.

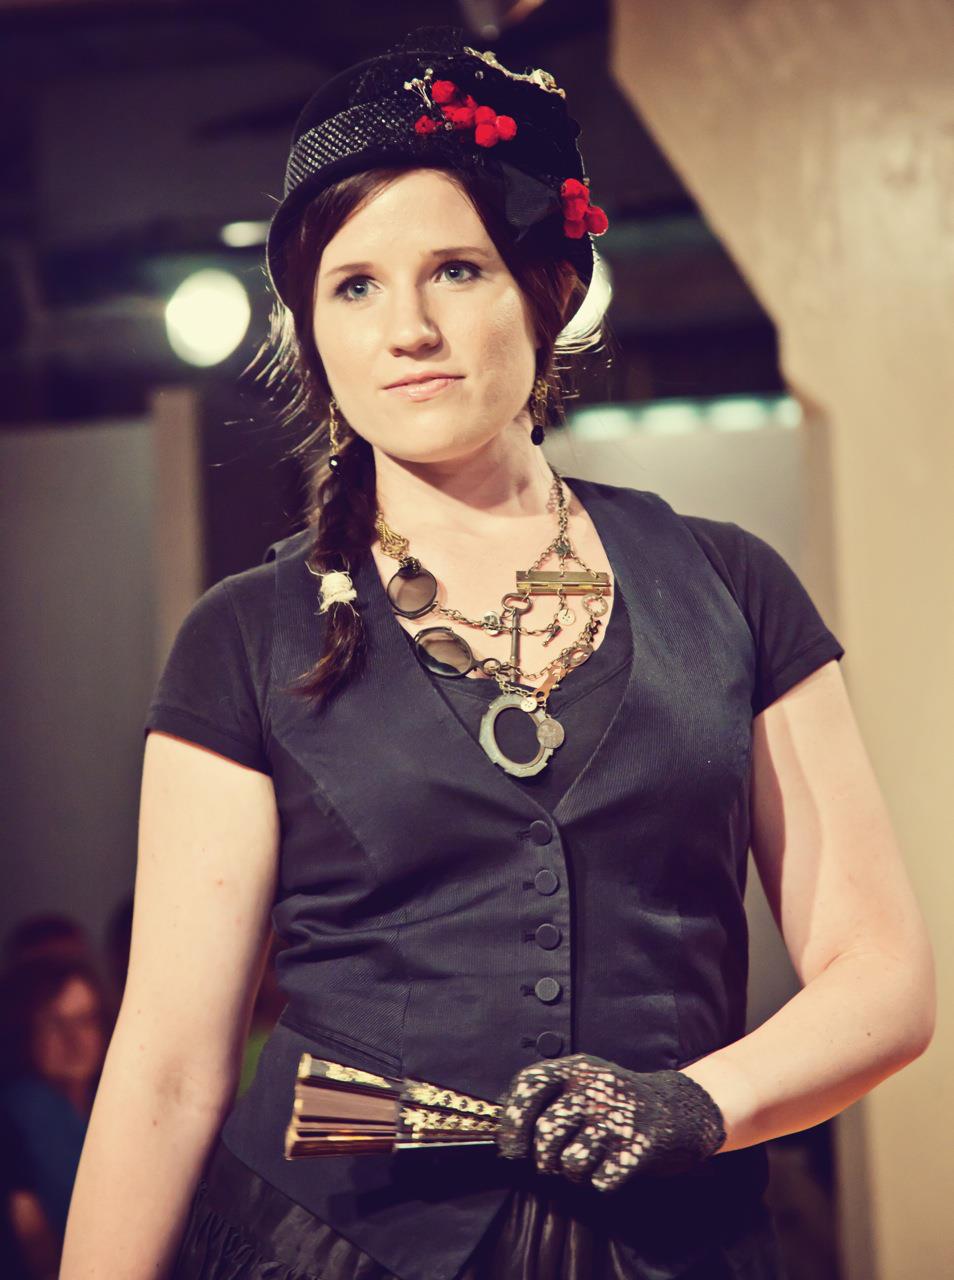
Renee modeled the Auntie Mame Bowler, gearrings, and the Amalia Popper Opera Necklace (for which I won honorable mention in Bead Magazine's steampunk contest).

At the end of the runway, Renee activated her prop--a fan which she opened with a swift flick of her wrist!

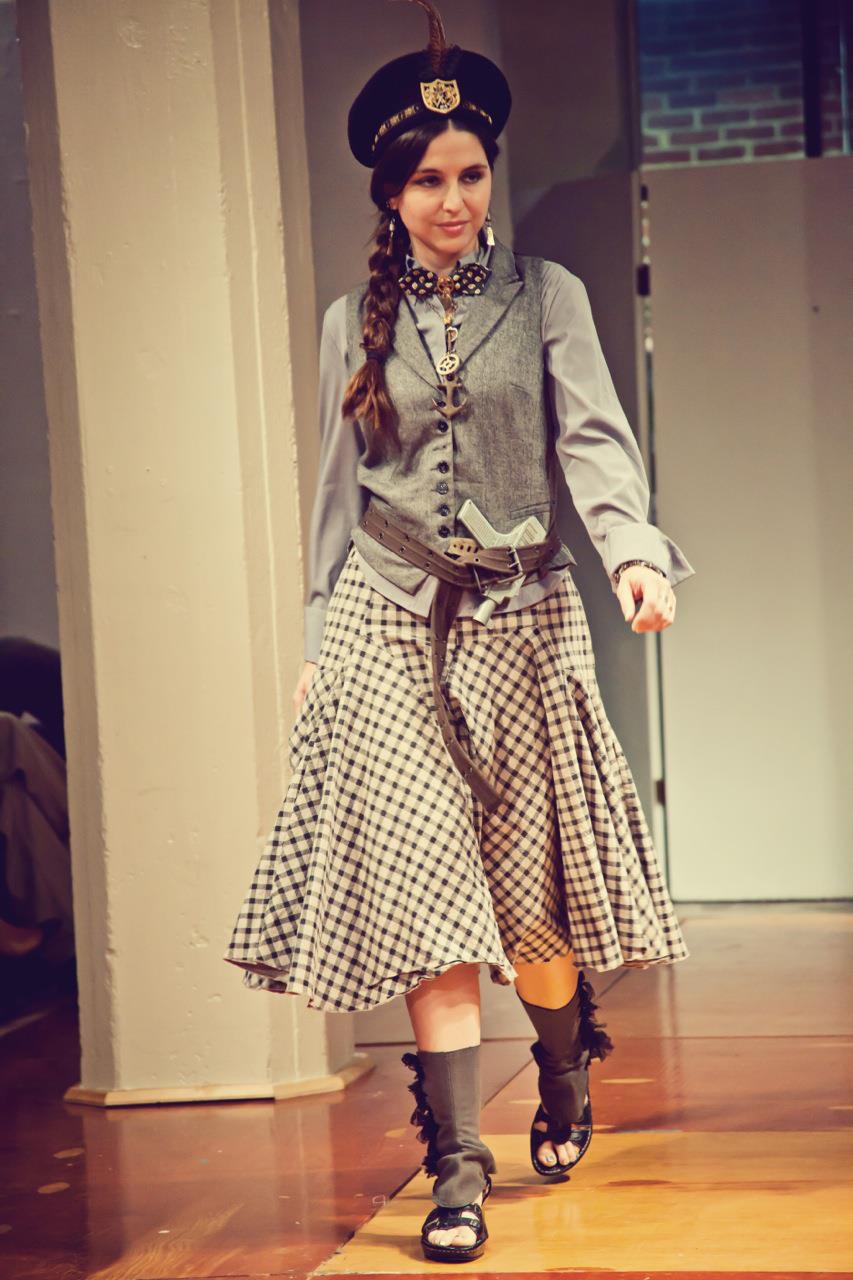
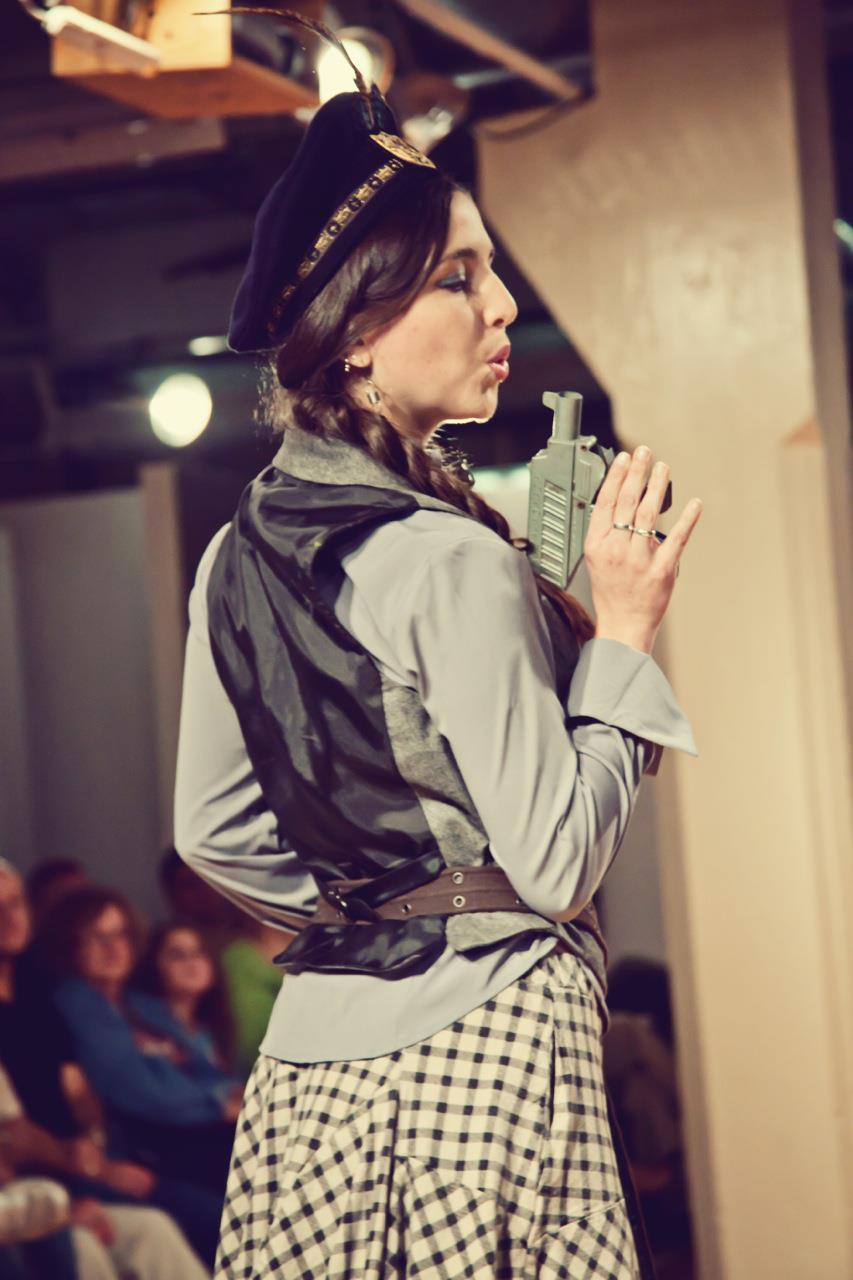
Next came Holly wearing a Steampunk Scottish Beret, gearrings, the No. 117 Steampunk bow tie, an electrical fuse bracelet, and the Seaside Girls Steampunk necklace (made for LiberateUlysses's Bloomsday Art Project in 2012).

At the end of the runway, Holly activated her prop--a gun (an vintage paper popper).

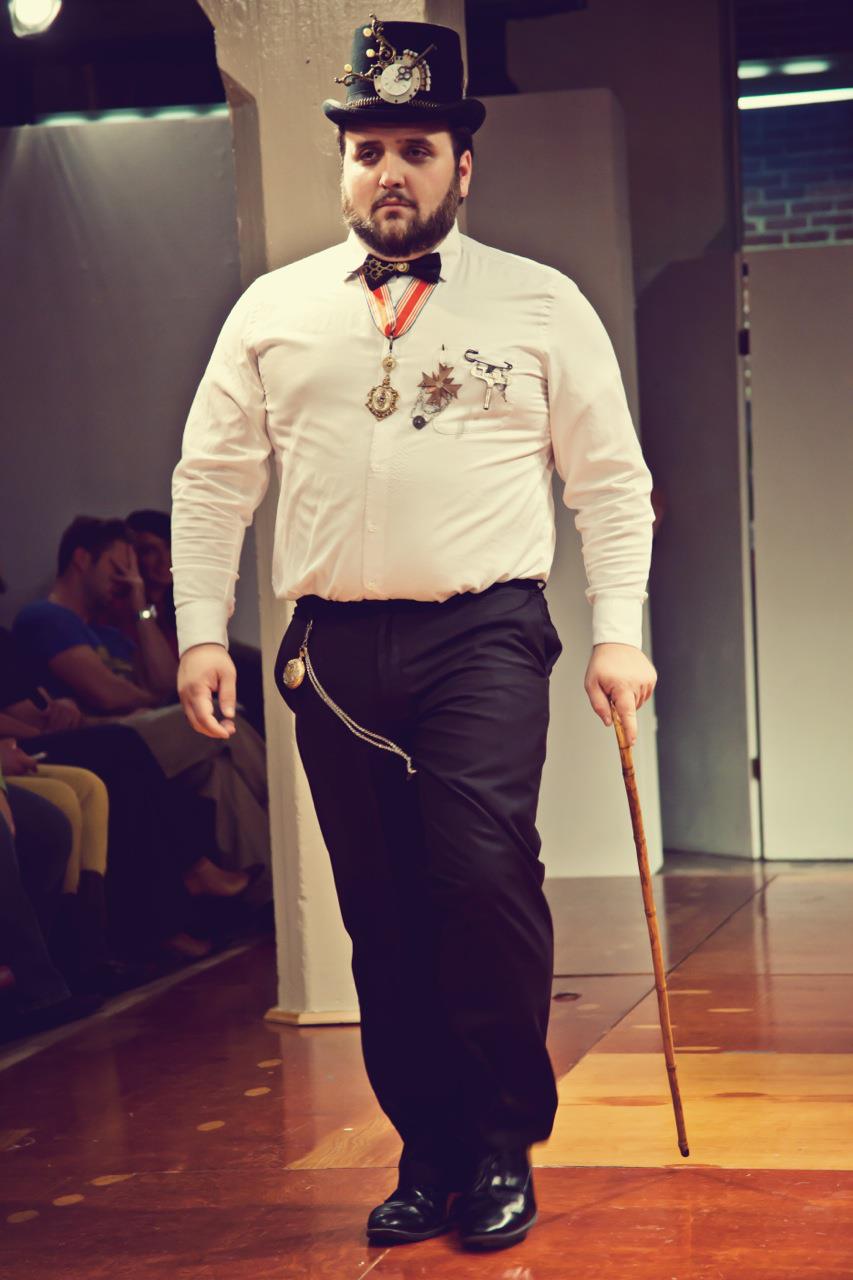
Doffing his tophat to Holly, Thom sauntered up the runway wearing the Tick Tock Top Hat, Imperial Steampunk medal (necklace), Steampunk General's medallion (pinned right), and Skeleton Key Kilt Pin (pinned left).

At the end of the runway, posing like the gentlemen he is--Thom paused and checked the time on his steam train pocket watch while leaning on his cane.

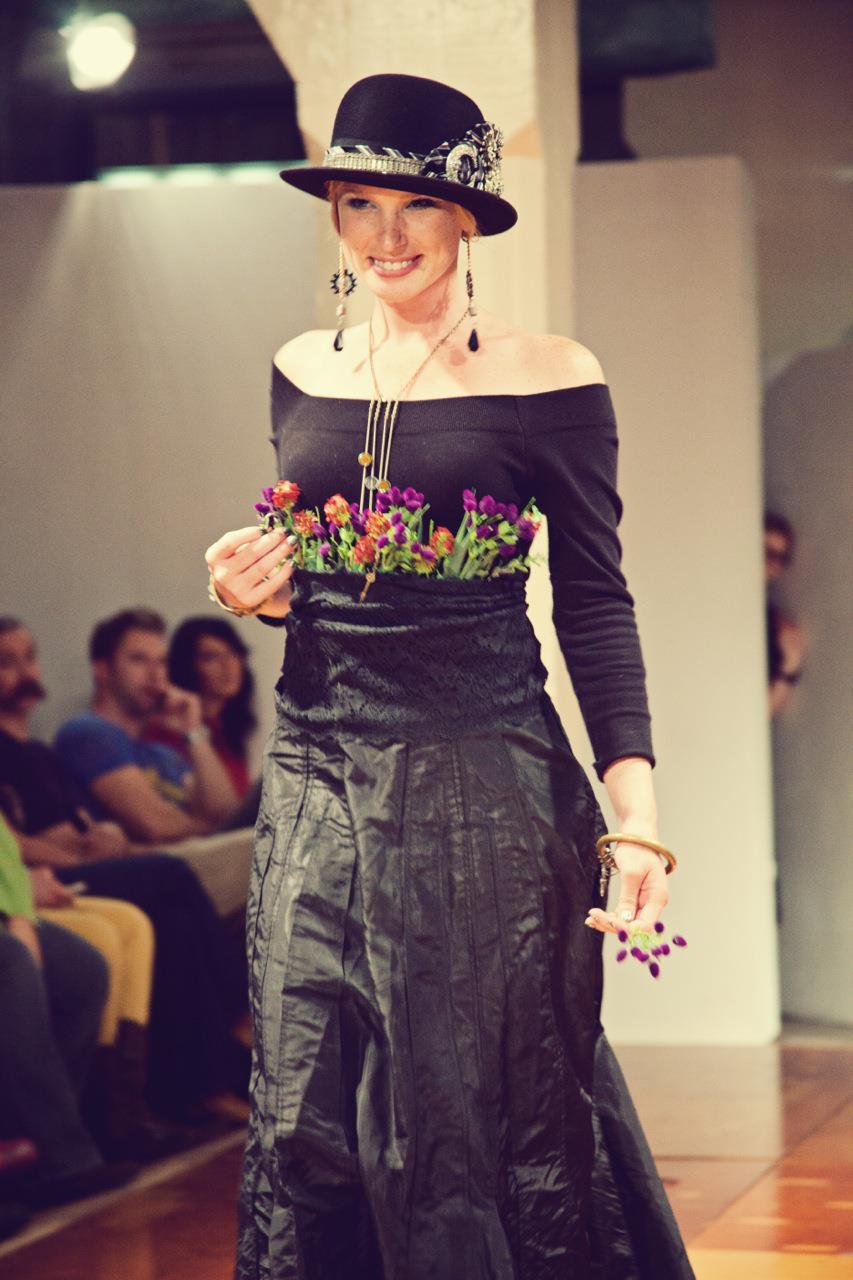
As Frenchy and the Punk's gypsy tune, "Dark Carnivale," played on, our next model, Kathleen wearing the Puttin' On the Ritz Steampunk Bowler, gearrings, gold gear cuff, spiral skeleton key cuff, and typewriter key necklace ripped flowers from her lace bodice and threw them out into the audience. Kathleen saved a bunch of violets for Melissa--our final model.

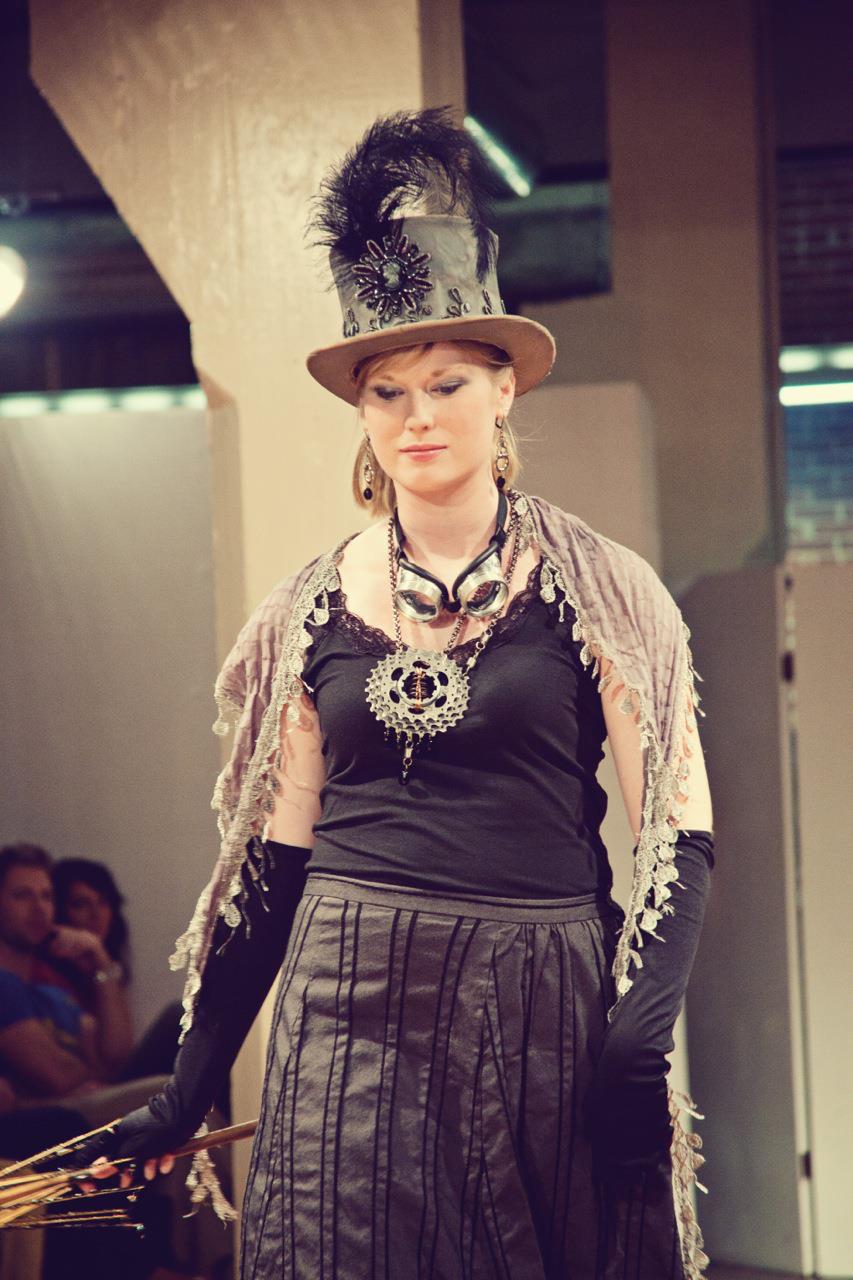
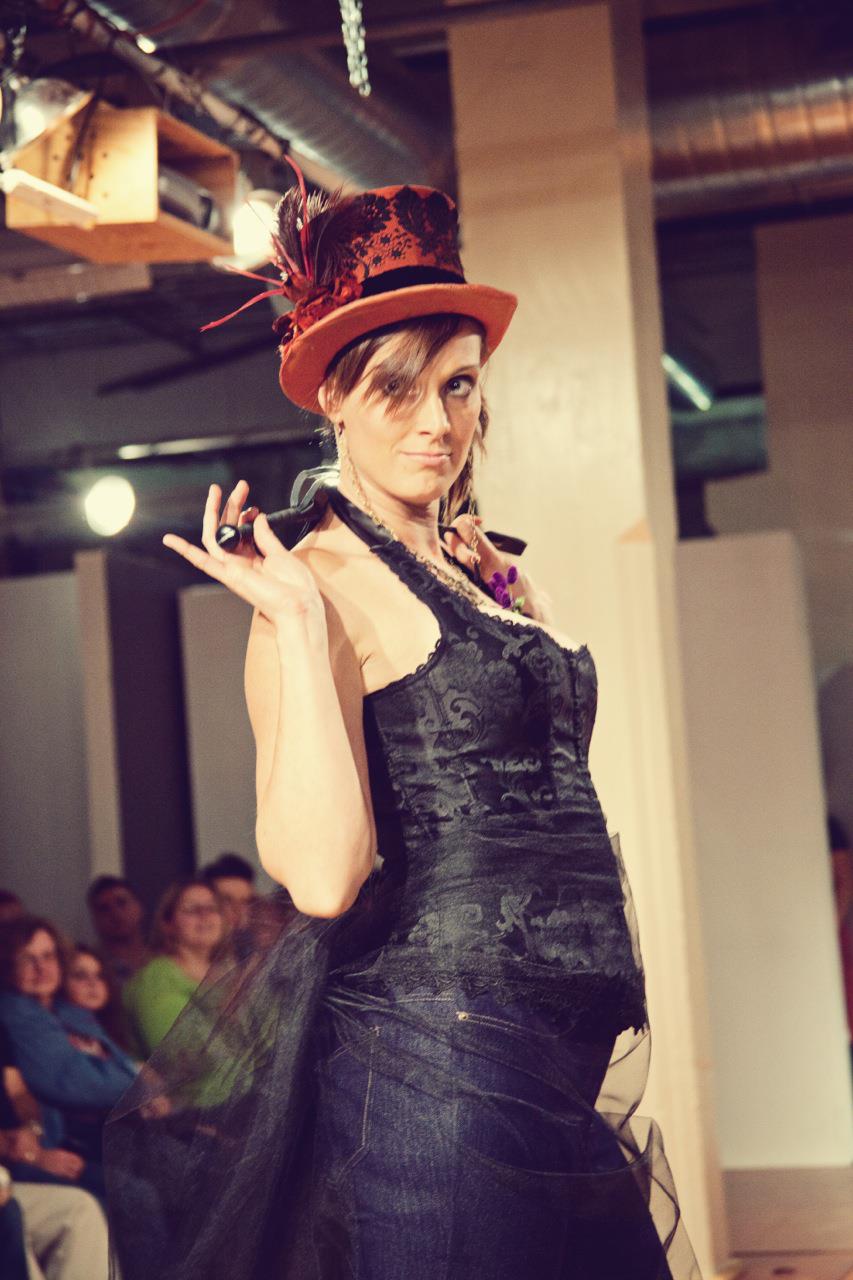
Melissa wore Frankly Scarlett Steampunk Top Hat, gearrings and a spiral cog necklace. Her prop, a riding crop, was activated all down the runway! The cattle call was so much fun--it was surreal being up there with my mom with everyone clapping. To see so many smiles, I knew we had pulled it off and transported them somewhere magical.

Thank You

First and foremost to my mom, for inspiring this collection of jewelry and for creating such beautiful hats. You keep challenging me & I am so grateful that you do! Second, thanks to Christine Crowe for insisting that I do the fashion show in the first place. Without that push, I would never have dreamed of doing this! Third, my wonderful models--Caroline, Renee, Holly, Thom, Kathleen, and Melissa! You were so wonderful and I couldn't have done it without you! To the volunteers at Indie Emporium who organized the music & helped us with a run-through. And last but not least, to Val Esparza for all of your help & support!

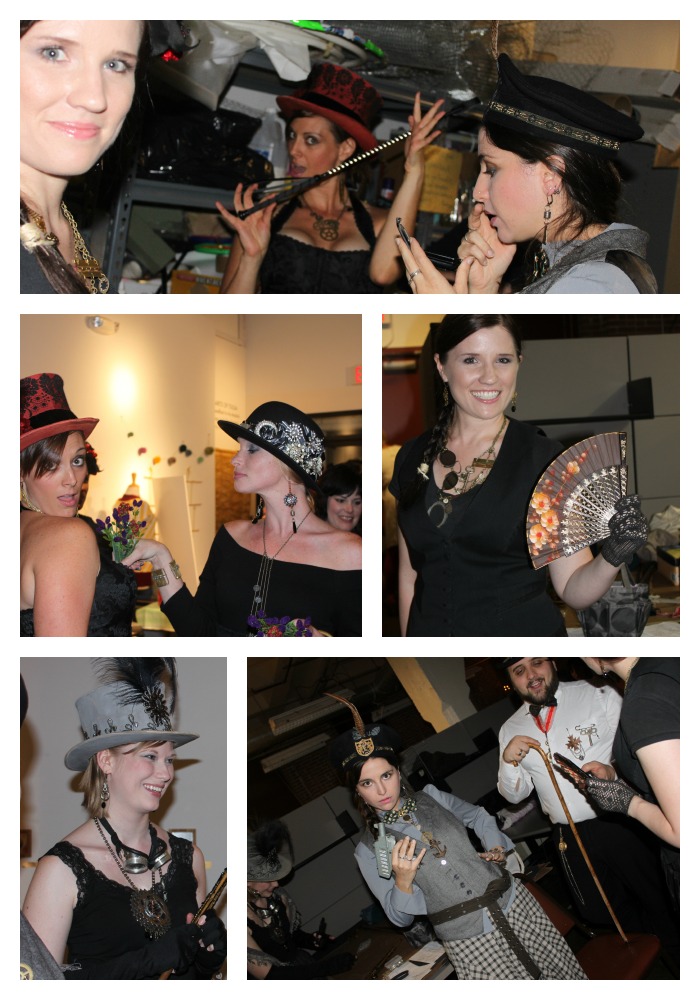
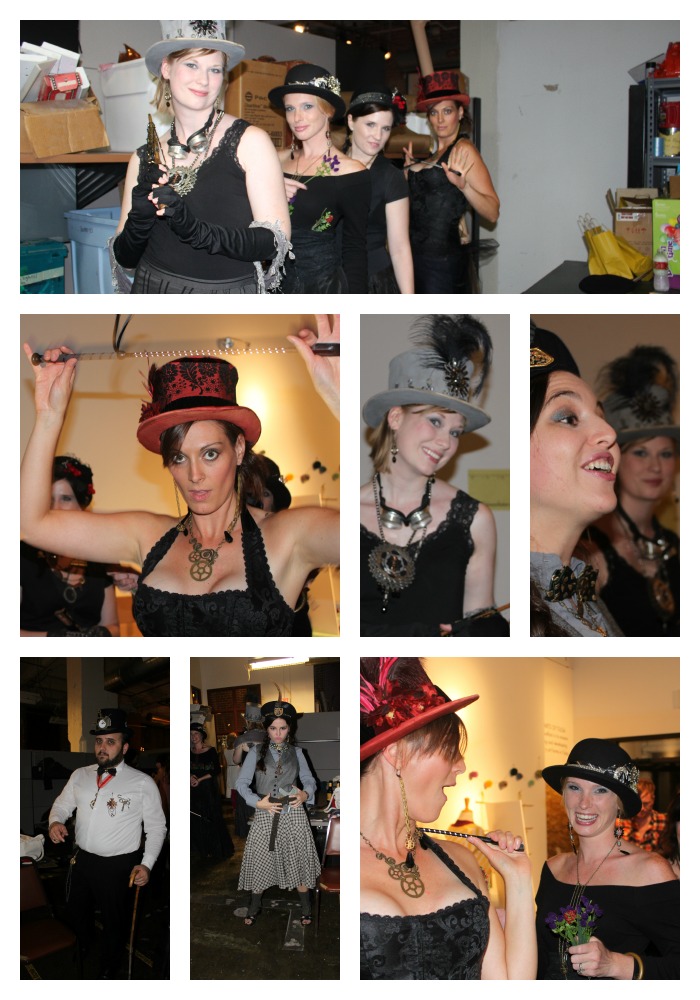
Here's a little of our behind the scenes madness/goofiness!

By the way--did I mention that Juliette Lewis loved Holly's outfit?!! She didn't stay for the show but she did snap a photo of Holly with her phone! Gleep! So freakin' cool! An outfit I styled is on Juliette Lewis's phone!